Variables let you personalize a bulk message for each recipient — inserting values like a contact’s name, company, or any custom field into the message text. You can see exactly what each contact will receive in a live preview before you send.
Go to Bulk messages > New bulk message, select your contacts, and proceed to the Draft Message step.
2
Add a variable
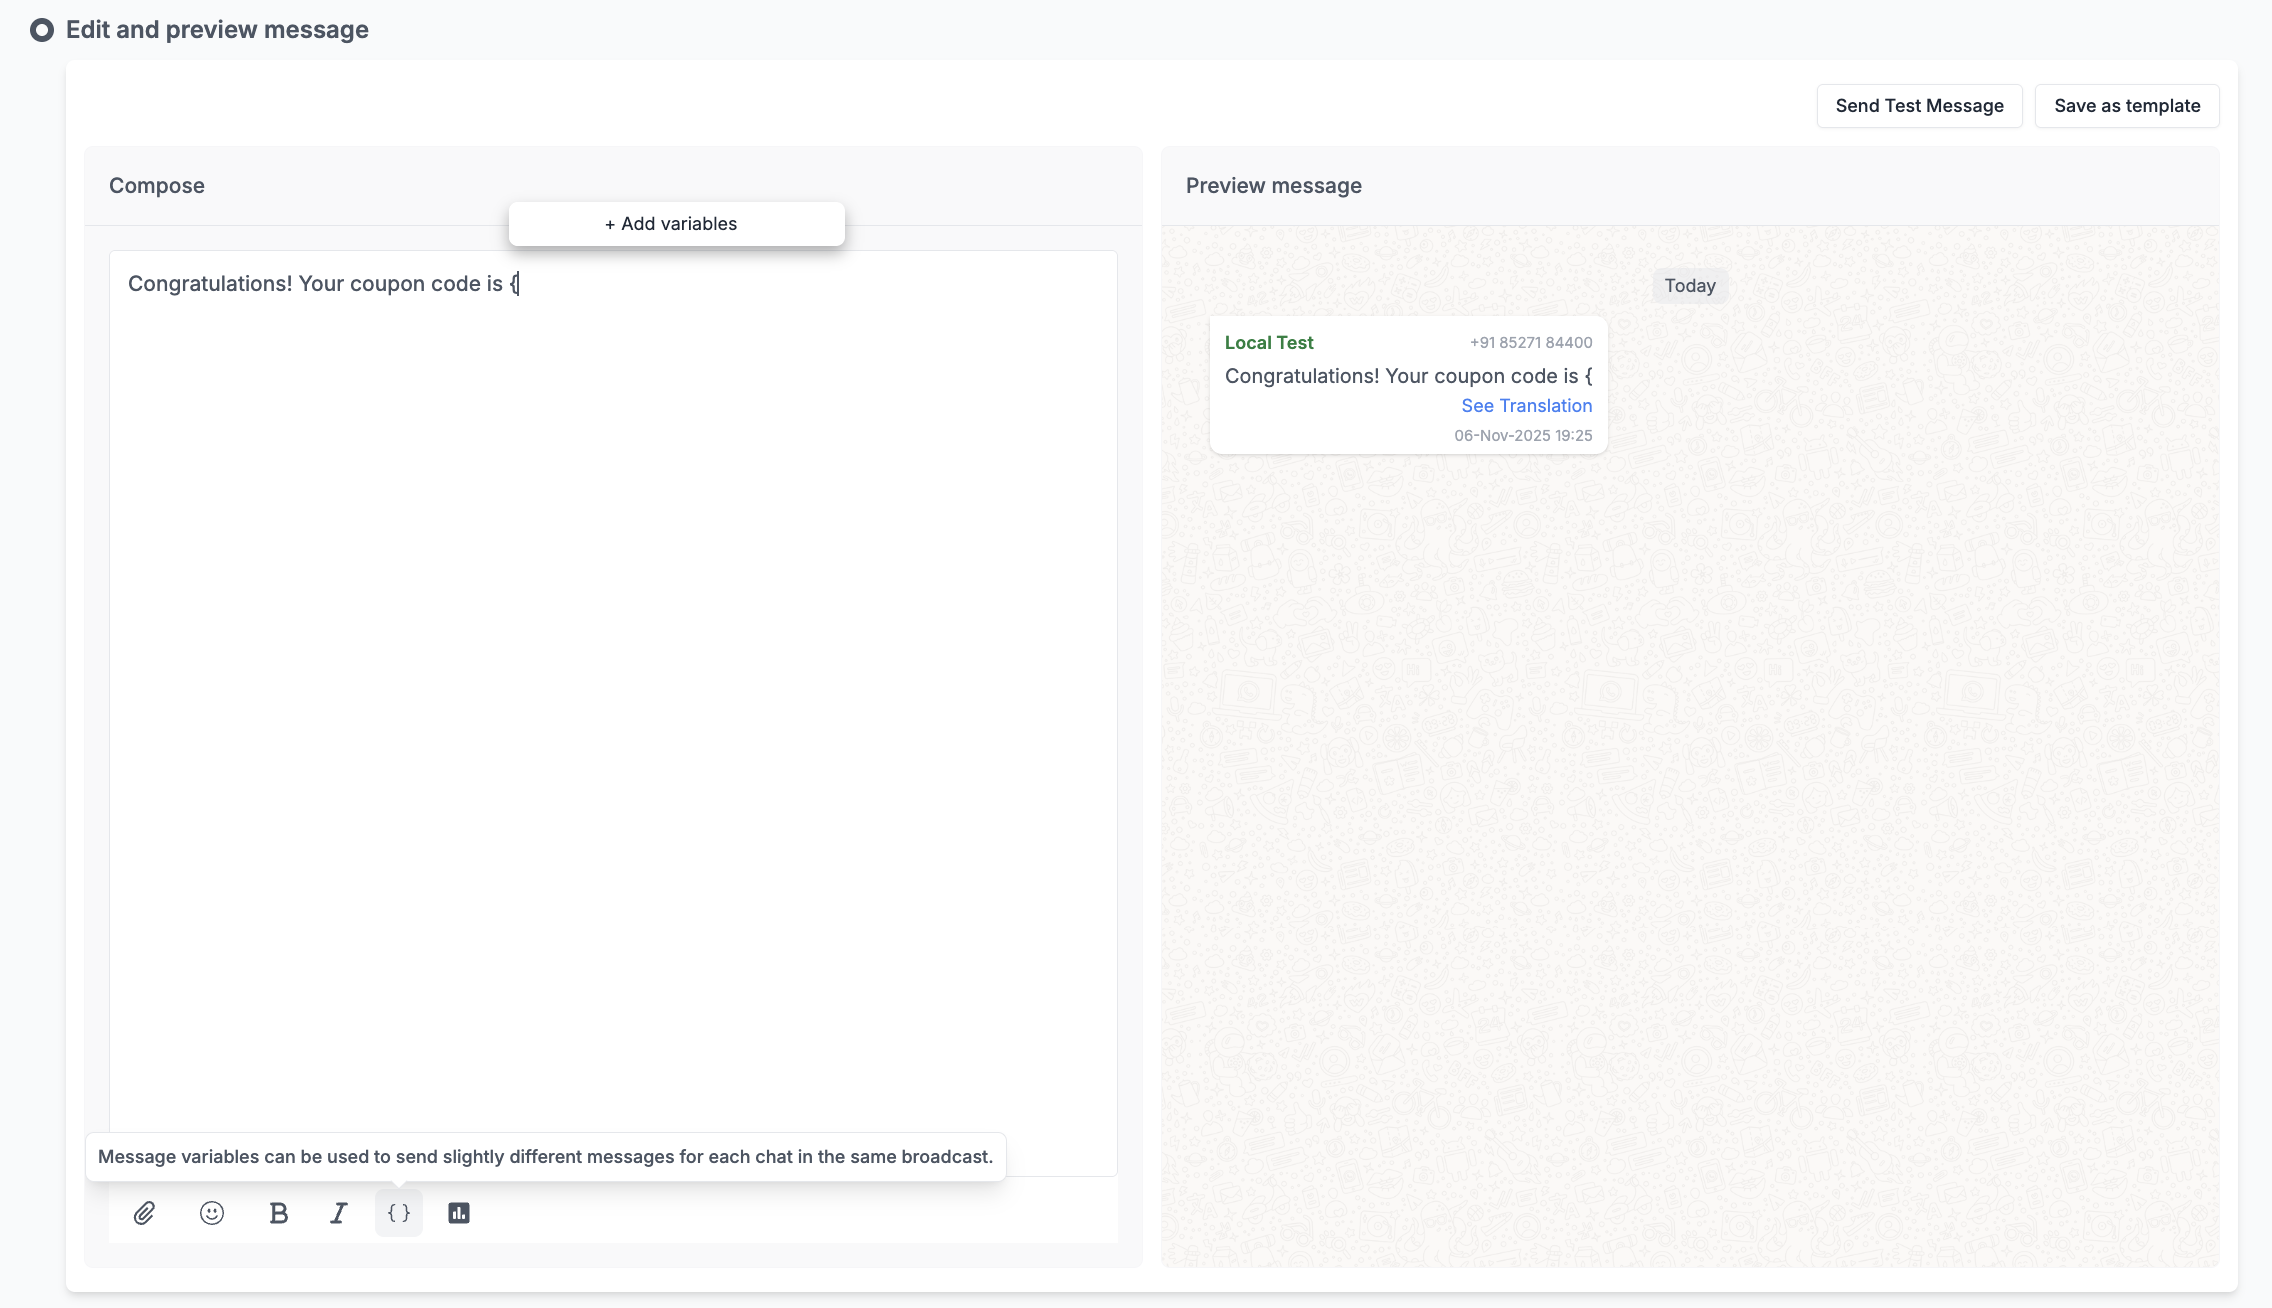
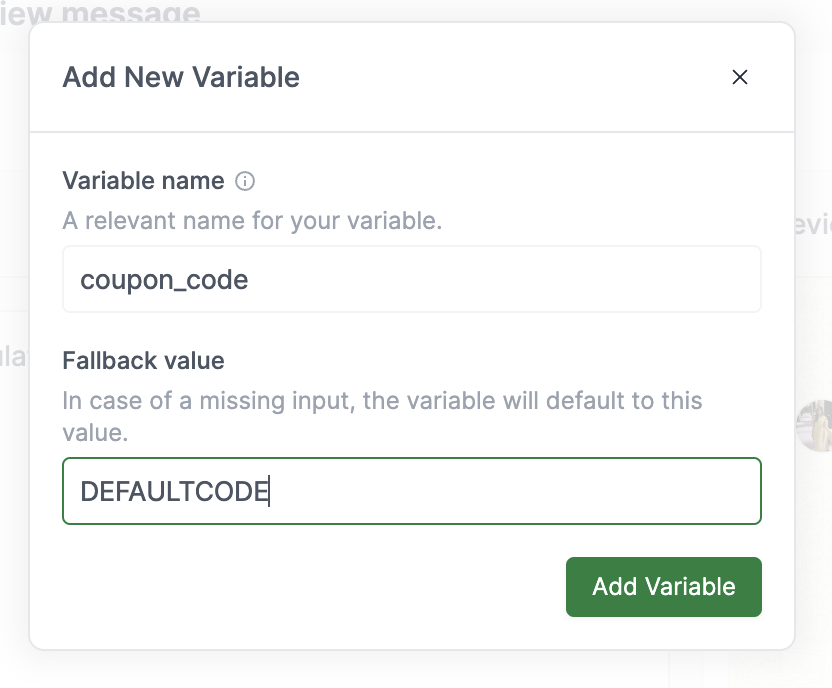
Click the {} button in the message toolbar, or type { directly in the message body. Enter a name for the variable and a fallback value. The fallback is used for any contact where you leave the field empty.
Add a Variable
Variable Modal
3
Insert the variable into your message
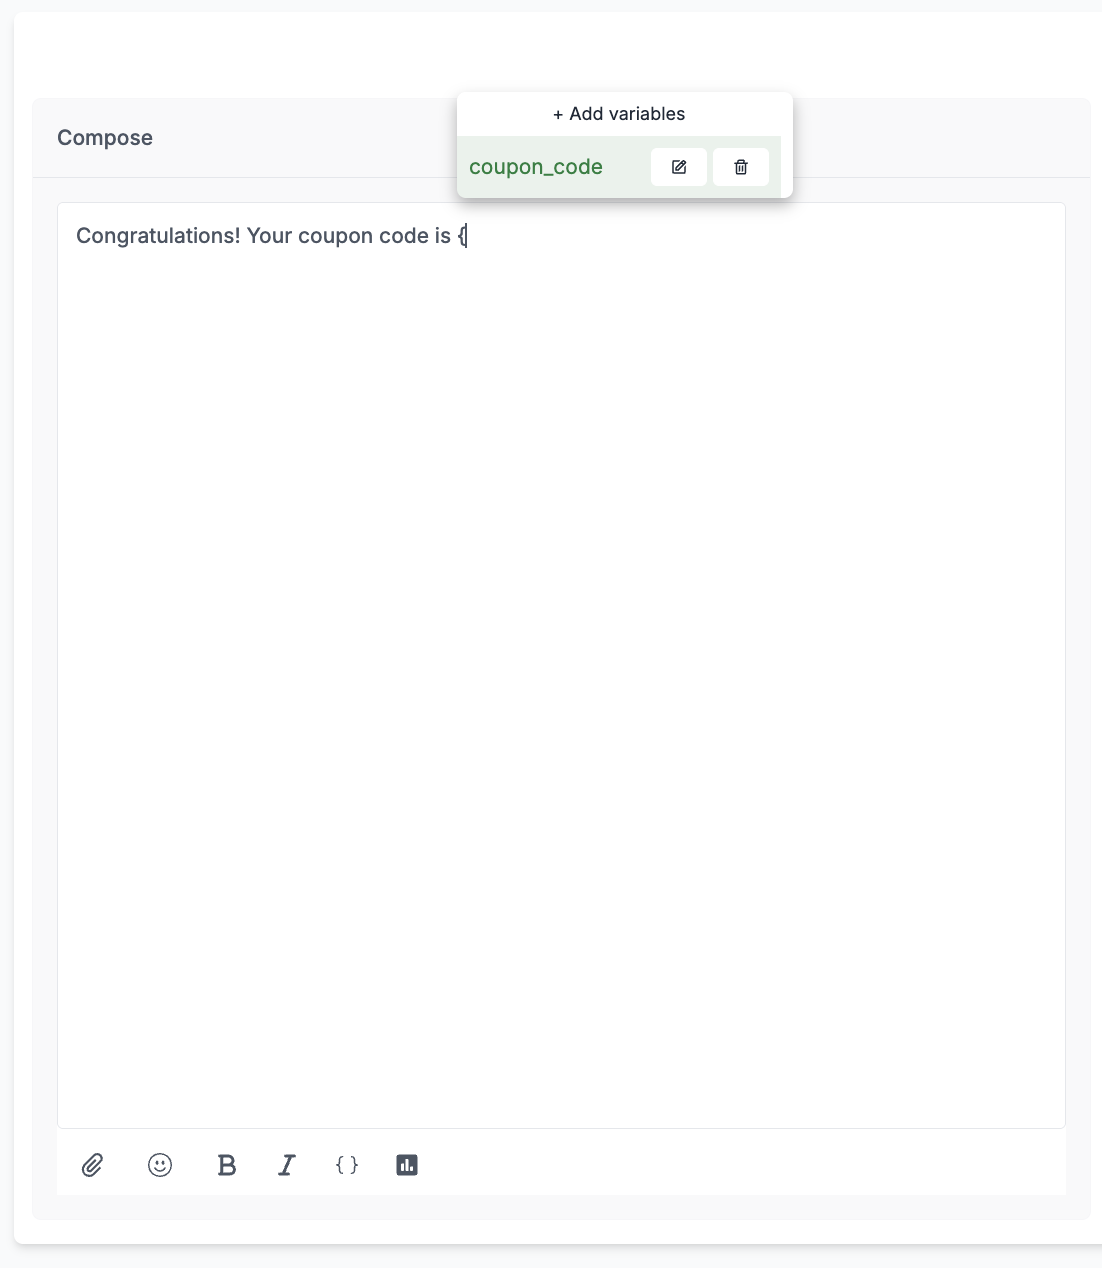
After creating a variable, insert it by selecting it from the pop-up menu that appears when you type {.
Insert Variable
4
Fill in variable values for each contact
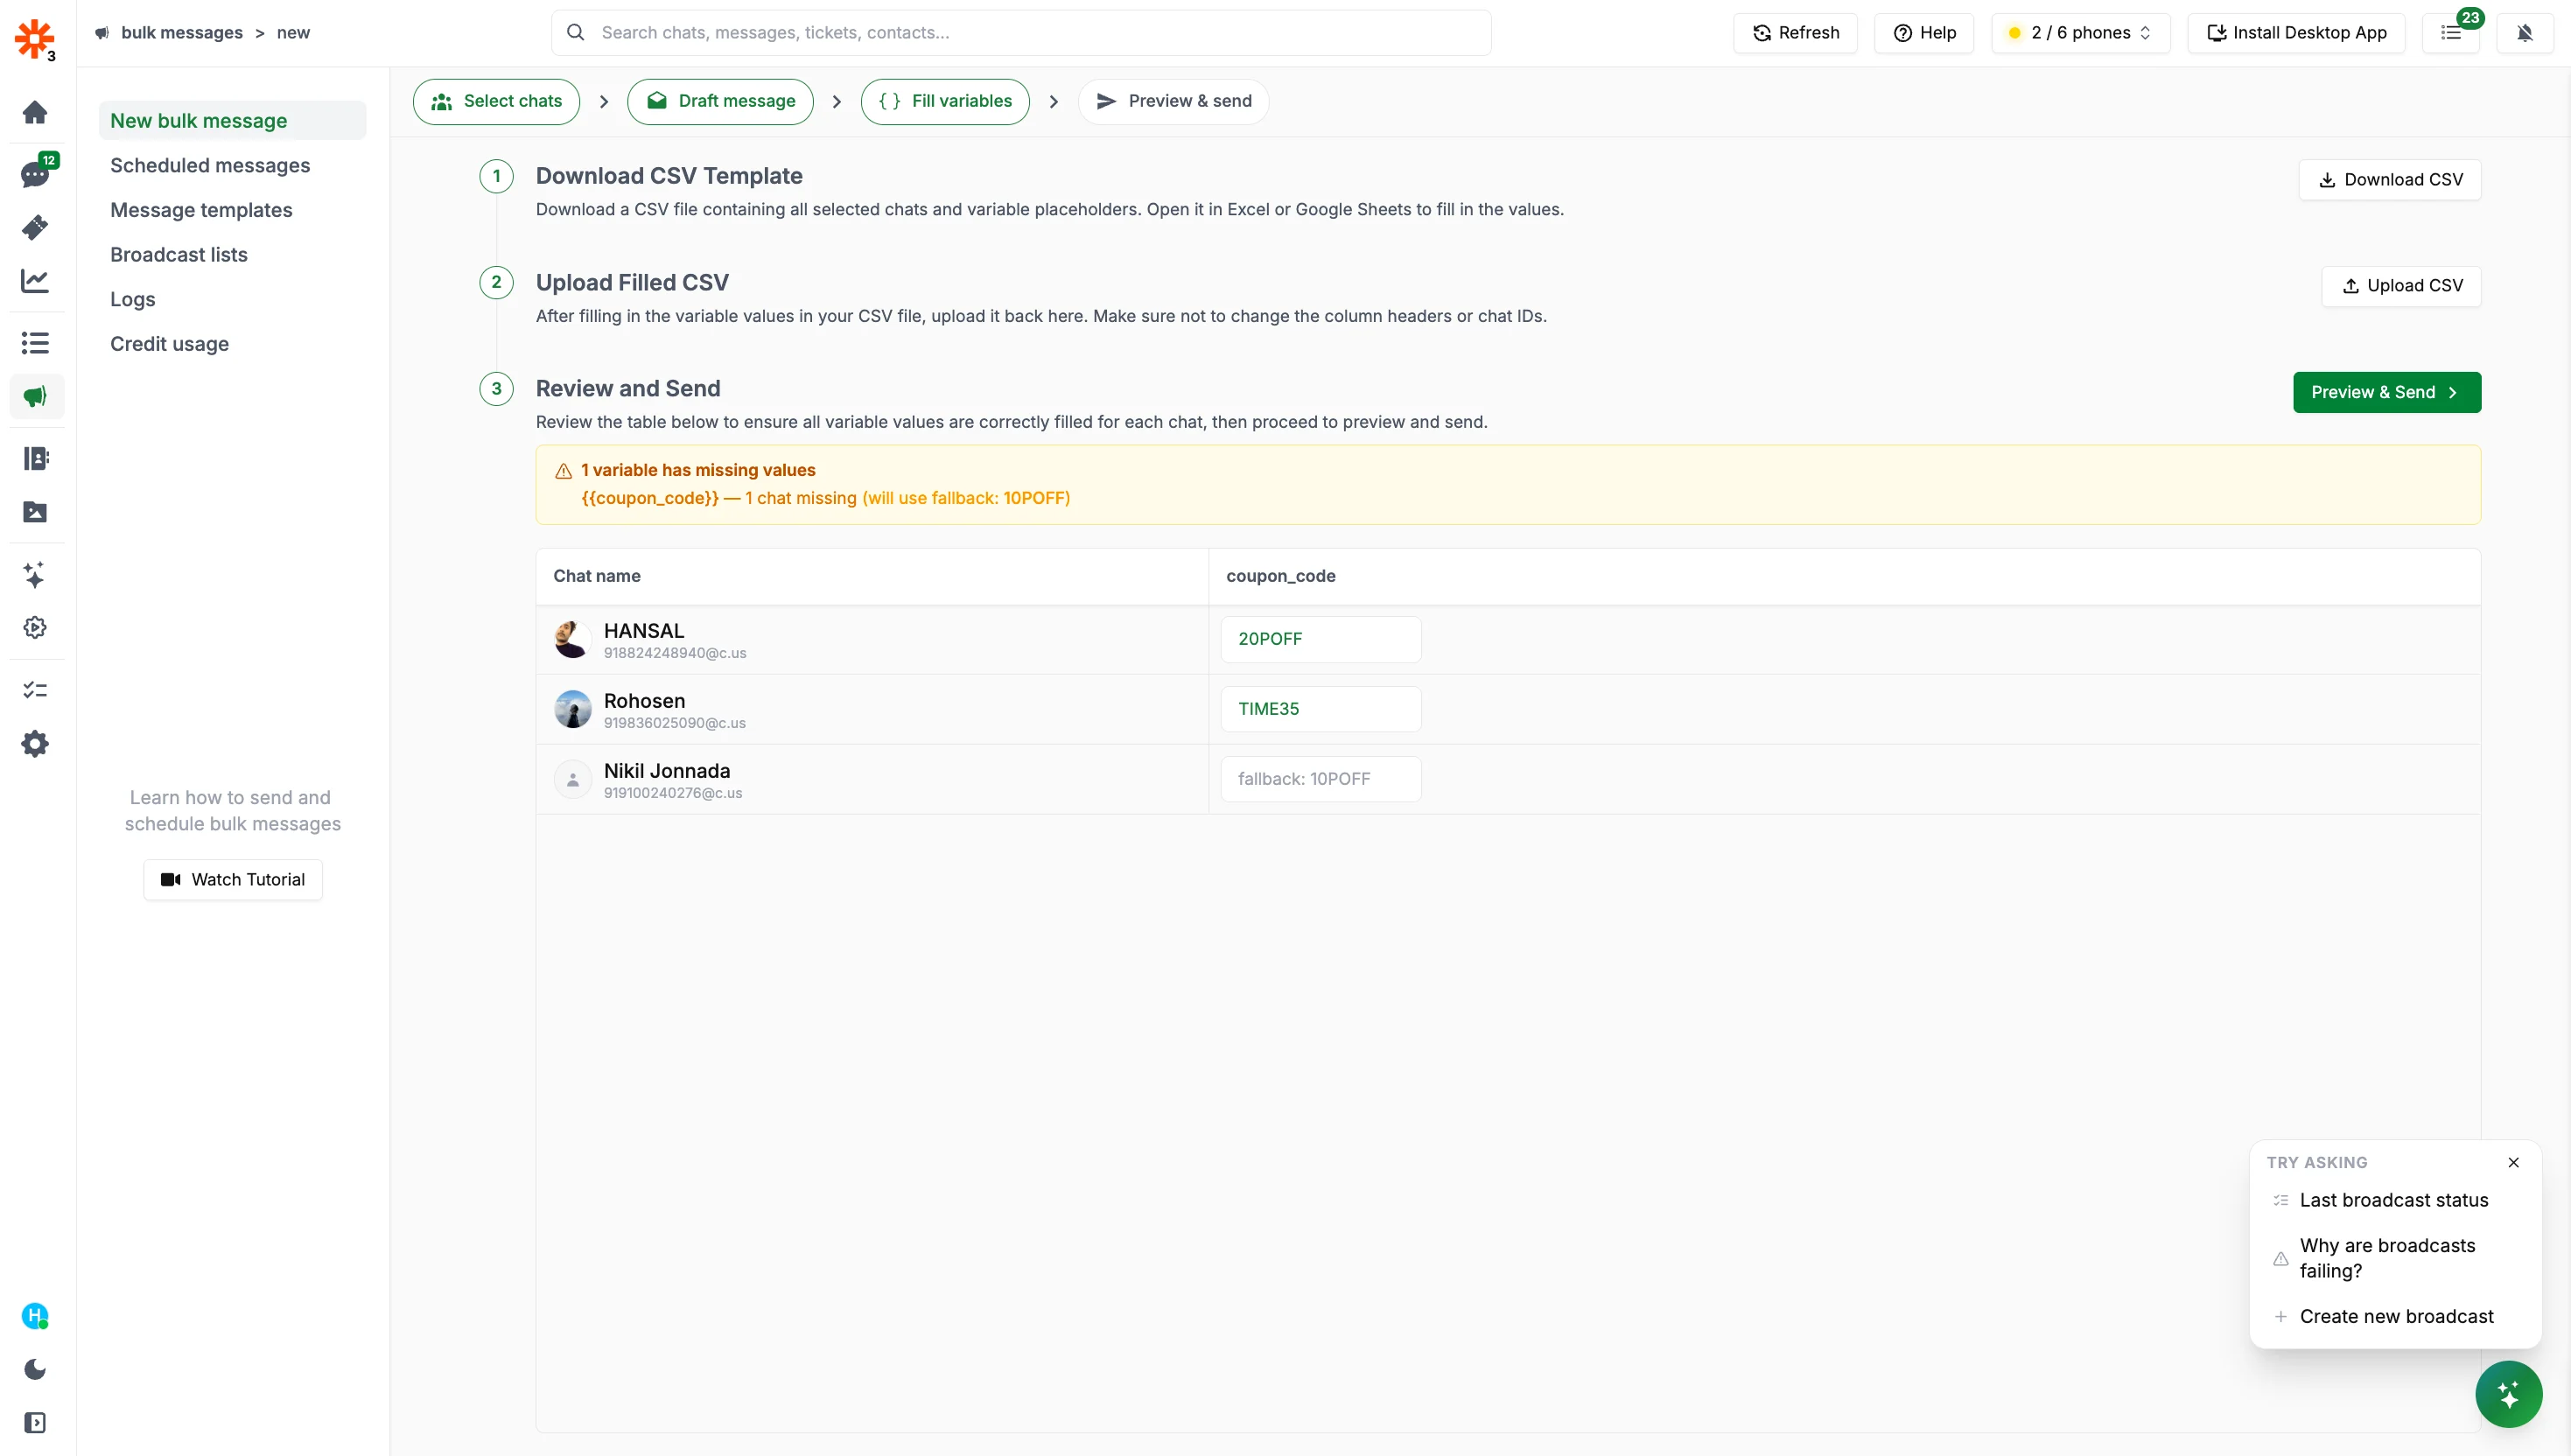
Click Next Step to open the Fill Variables screen. Each contact appears as a row in the table — fill in variable values directly.
Fill Variables
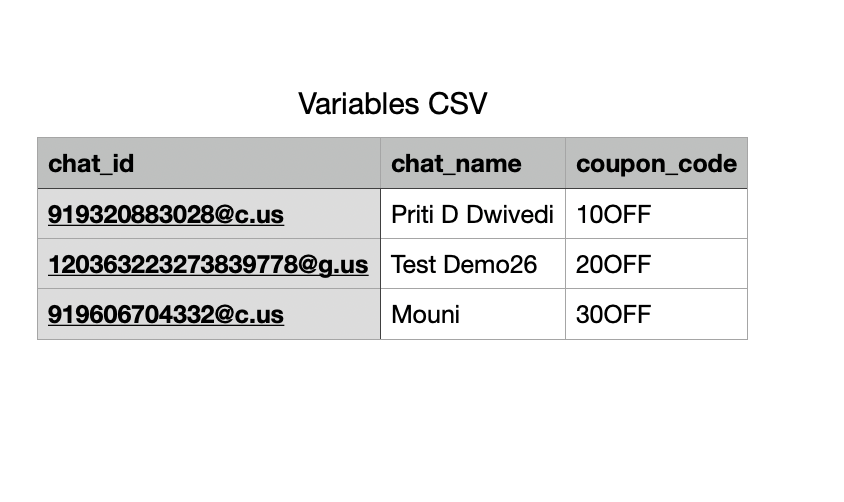
You can also fill values using a CSV. Download the CSV from the top right corner, fill in values using Google Sheets or Excel, then upload it back.
Edit CSV File
Do not modify the columns or add/remove rows in the downloaded CSV. If you need to add variables or chats, make those changes in the table first and download a new CSV.
Upload CSV
5
Preview the messages before sending
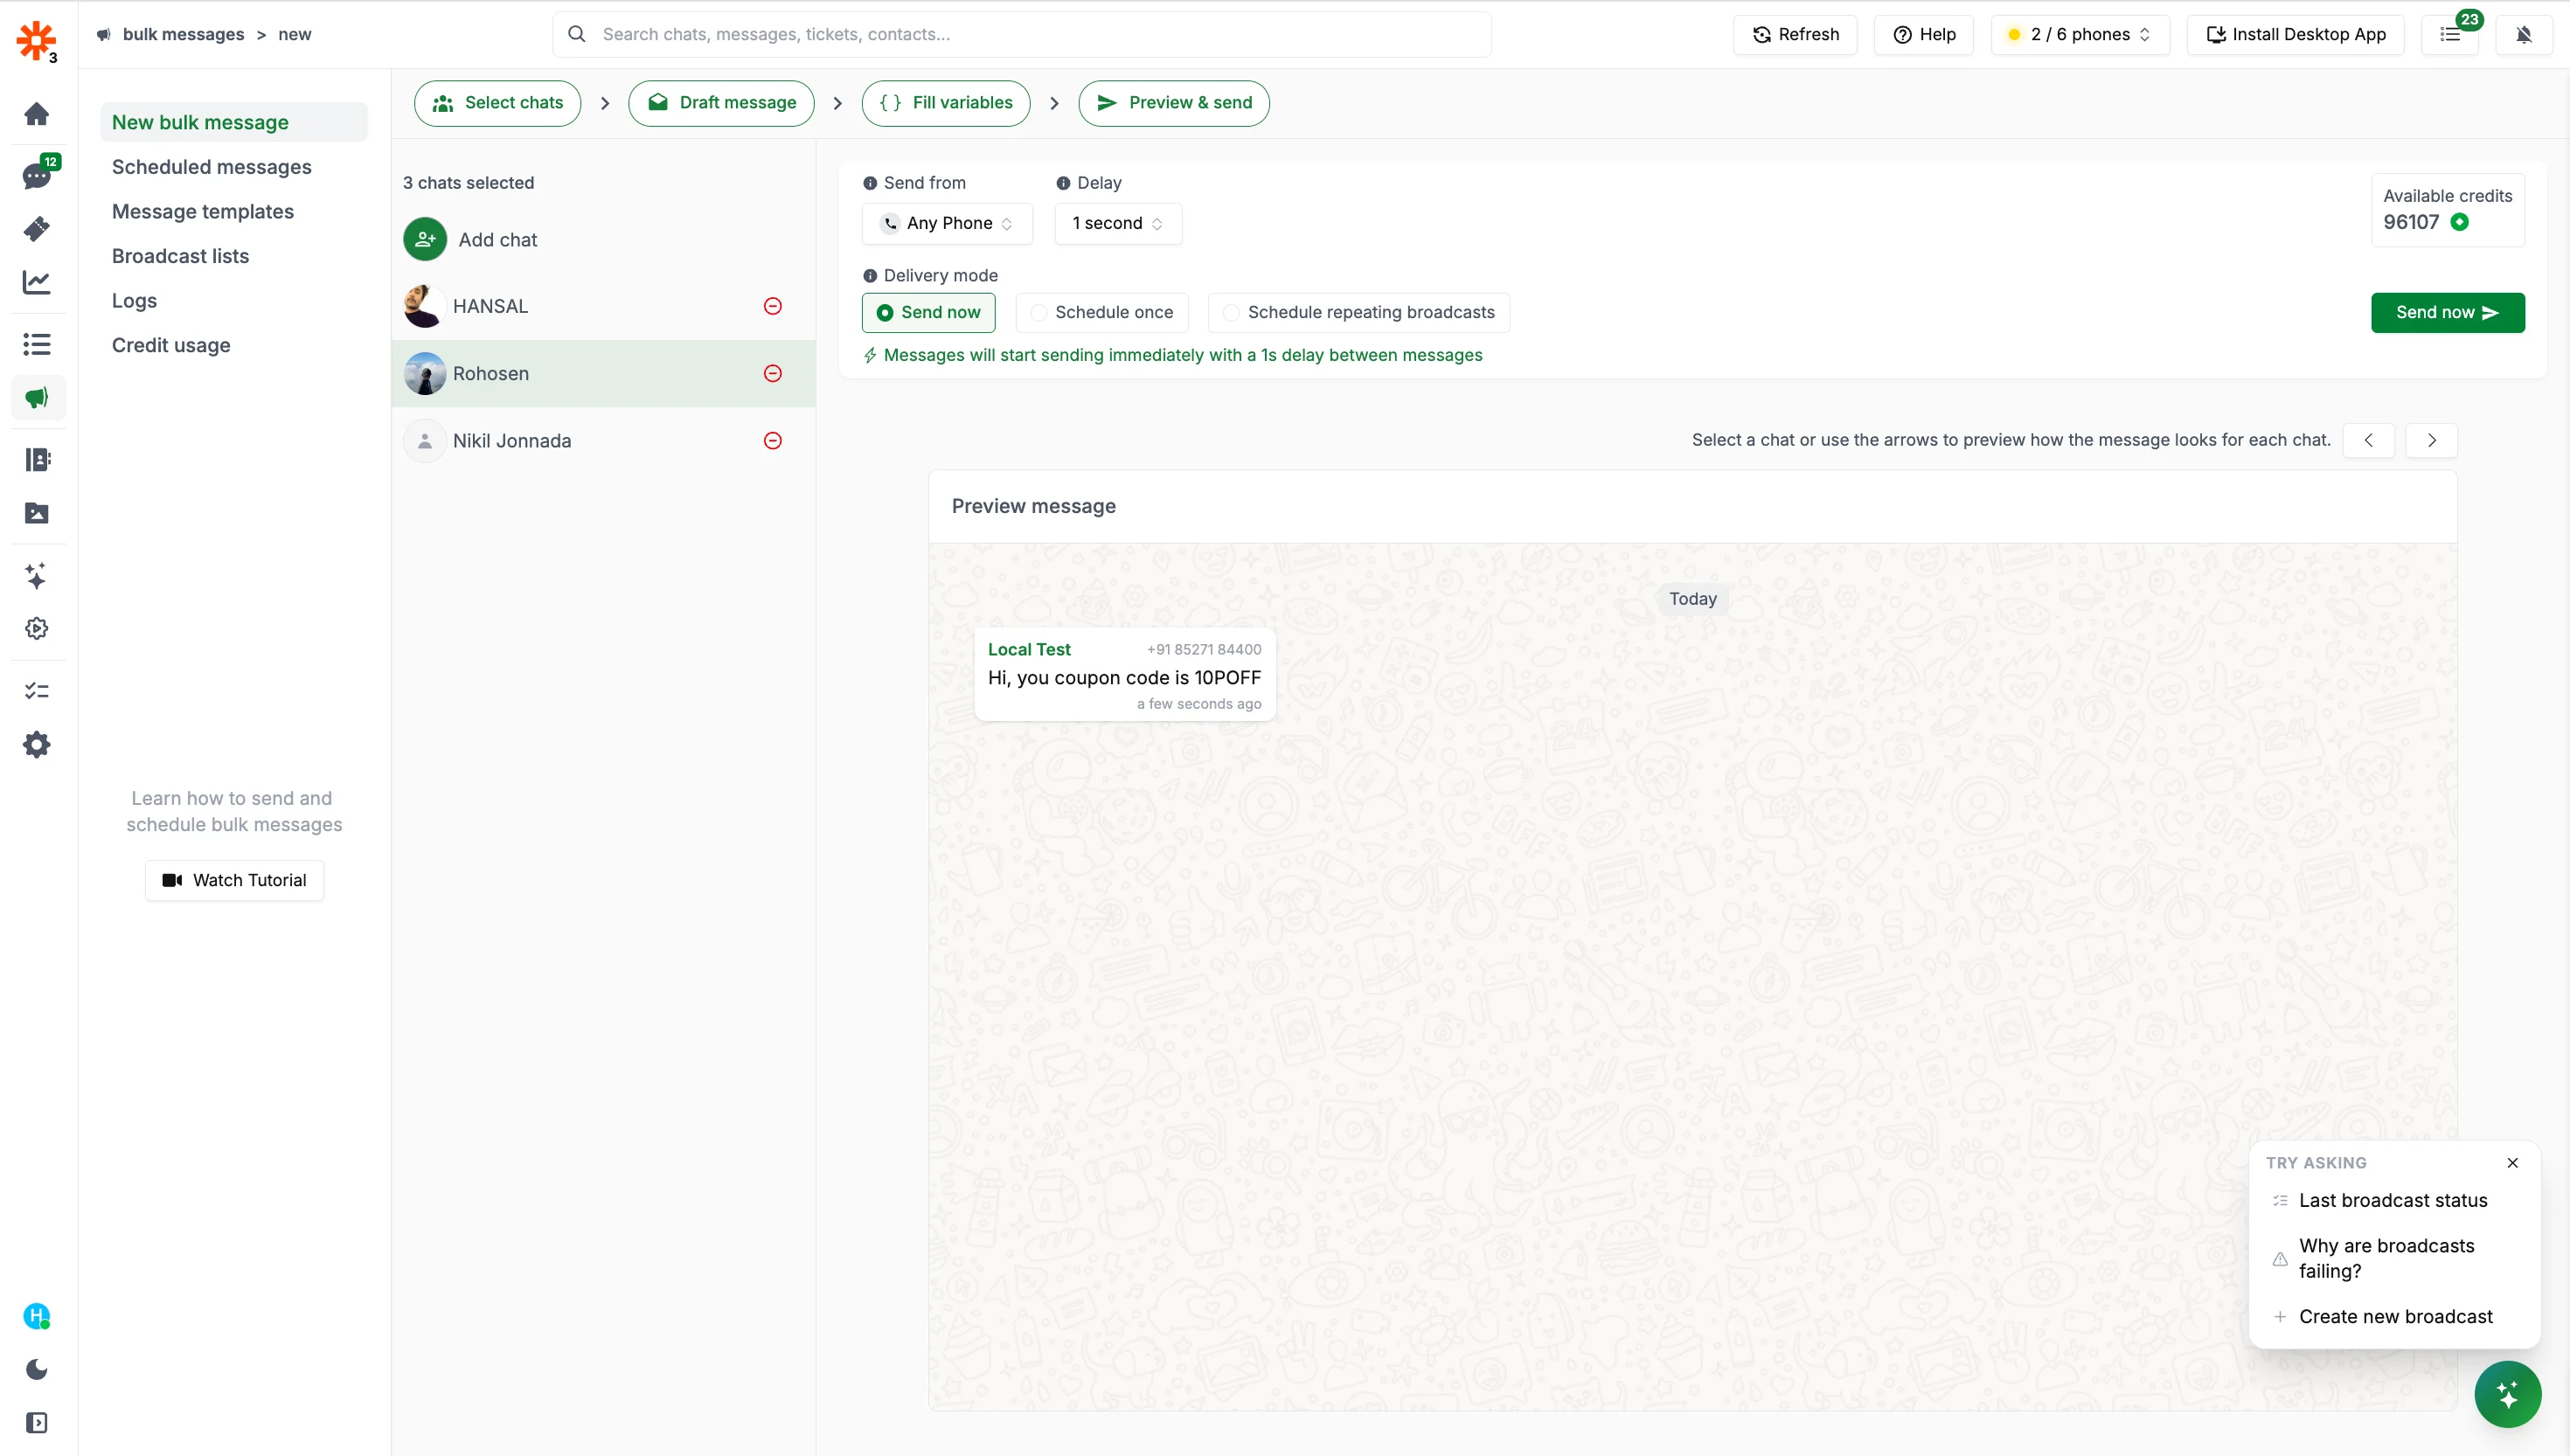
Click through each contact in the preview panel to see exactly how the final message will look for that recipient, with all variables replaced by their actual values.
Preview Variables
6
Choose a delivery mode and send
Once happy with the preview, choose a delivery mode and send. See Sending a Bulk Message for delivery options.
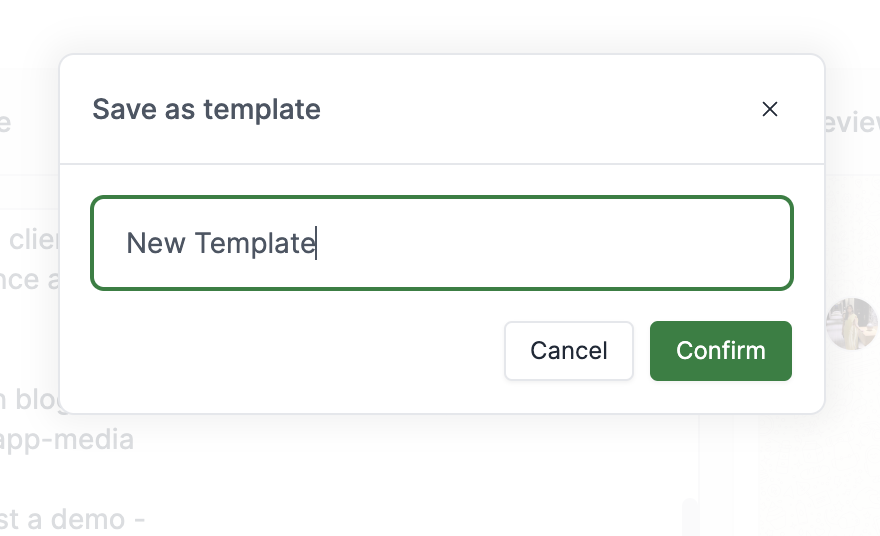
When drafting a new broadcast, click the template picker to load a previously saved message. The message content, variables, and any attachments will be pre-filled.