The Challenge
You are managing dozens of WhatsApp conversations. A customer sends an urgent message that needs to become a support ticket. You manually copy the details, switch to your ticketing system, and create a ticket. Time-consuming and error prone. Solution: Create tickets directly from WhatsApp messages with a single click. All context preserved. All details pre-filled. Instant.Creating a ticket from a WhatsApp message is simple:How It Works
- Find the message you want to convert into a ticket
- Right-click the message and select “Create Ticket ”
- Fill in ticket details (title, priority, assignment, etc.)
- Click “Create Ticket”
Getting Started: Find Message and Create Ticket
Open the WhatsApp conversation in Periskope and locate the message you want to convert into a ticket. This could be a customer request, complaint, feature request, or any message that needs tracking.Step 1: Find Your Message
Right-click (or long-press on mobile) on the message. A context menu will appear. Select Create Ticket from the menu options.Step 2: Right-Click to Create Ticket
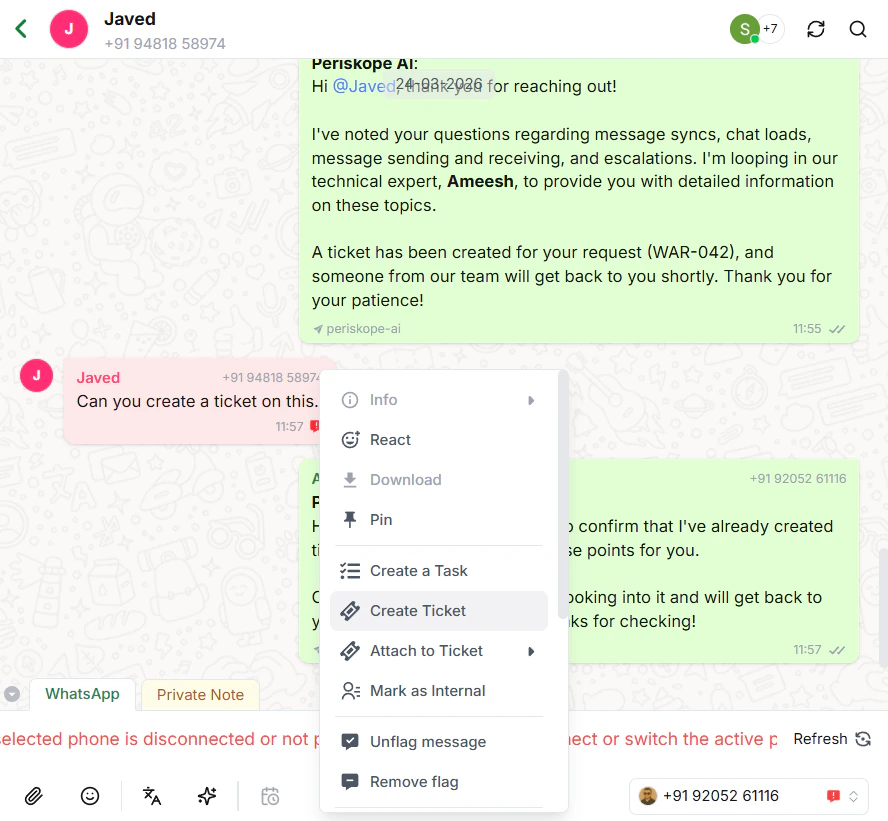
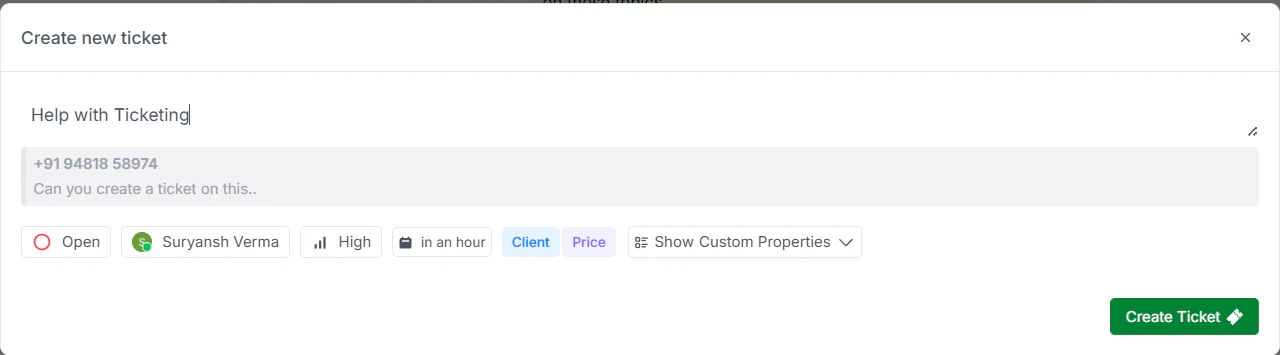
The message text is automatically captured in the ticket. You dont need to copy anything manually.
Enter a clear, descriptive title for your ticket. This helps your team quickly understand the issue at a glance. Examples:Step 3: Add a Ticket Title
- Billing inquiry - customer overcharged
- Feature request - export to CSV
- Account locked - reset password needed
- Payment processing issue - urgent
Configure Ticket Details
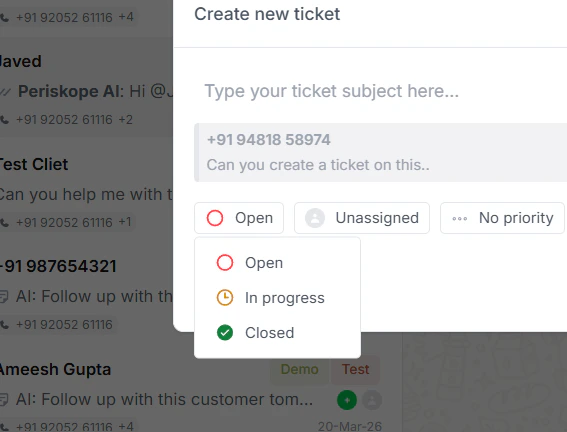
Choose the initial status for your ticket. Most new tickets start as Open. You can change the status later as your team works on it.Step 4: Set Ticket Status
| Status | Meaning |
|---|---|
| Open | New ticket, waiting to be addressed |
| In Progress | Team member is actively working on it |
| Closed | Issue has been resolved |
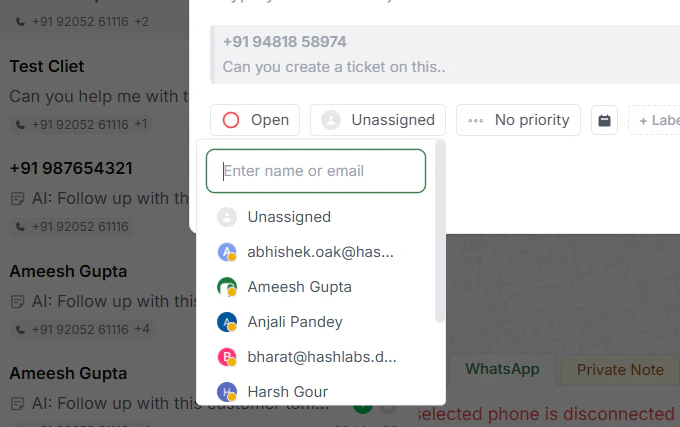
Choose which team member should handle this ticket. Either assign to a specific person to ensure they see it immediately or leave unassigned for your team queue to pick up. This ensures the right person starts working on it right away.Step 5: Assign to a Team Member
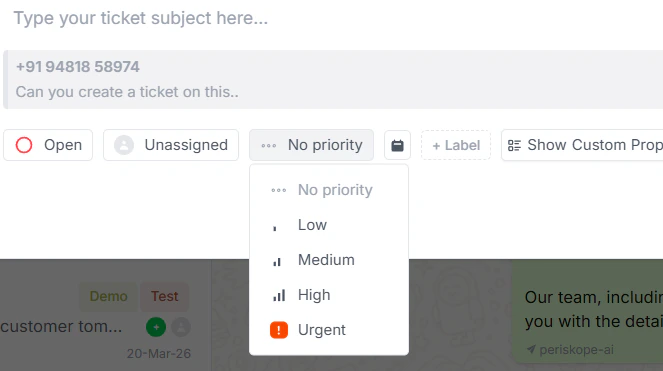
Define how urgent the ticket is. Priority helps your team focus on what matters most: _ _Step 6: Set Priority
- Low - non-urgent, can be addressed when team has capacity
- Medium - Standard request, can be scheduled
- High - Important but not an emergency, should be handled soon
- Urgent - Needs immediate attention, customer is frustrated
Define when the ticket should be resolved. Due dates help track SLA compliance. For example: Use 1 hour for urgent, 4 hours for high priority, 24 hours for Medium, 3-5 days for low priority.Step 7: Set Due Date

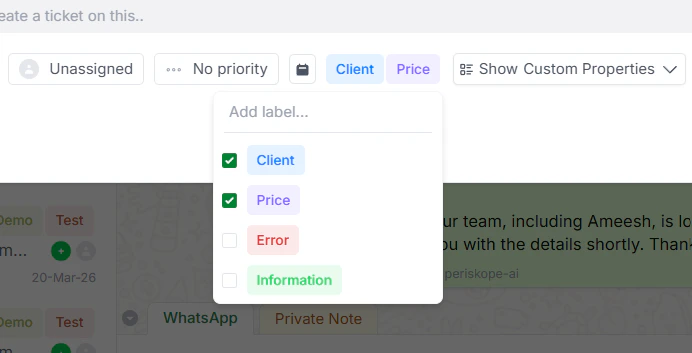
Labels help organize and categorize tickets. Create labels for:Step 8: Add Labels
- channels (Support, Billing, Technical)
- urgency (Urgent, Follow-up)
- or types (Bug Report, Feature Request)
Custom properties capture additional workflow-specific information like Team assignment, Product category, Customer tier, or Account status. Set these up in Settings > Custom Properties > Tickets, then use them to add context that helps your team understand the issue faster.Step 9: Add Custom Properties
Complete Your Ticket
Review all details one final time. Click Create Ticket to finalize. The ticket is now created and automatically linked to the original WhatsApp conversation. Your assigned team member receives a notification immediately and can start working on the issue.Step 10: Create the Ticket