Introduction
Guide to setup Authentication on Periskope
Welcome to the Periskope API documentation. Periskope APIs lets you extend the capabilities of WhatsApp and integrate it with your own app. The Periskope API is designed based on REST principles has predictable, responsibly named URLs and returns simple JSON objects.
The Periskope APIs allow developers to integrate WhatsApp messaging features within their own applications. Our APIs ensure straightforward and effective communication with your Periskope account, offering capabilities such as sending messages, raising tickets, creating groups etc.
Periskope API doesn’t support bulk updates. You can work on only one object per request.
Prerequisites
- A
Periskope account
: To use the Periskope API, you need to have a Periskope account. If you don’t have one, you can sign up for a free trial here. - An
API Key
: An API key is required for authentication and can be generated from your Periskope settings here. - An active
organization phone
: Along with the API key, you need to pass inx-phone
header with your phone number to validate any API request sent to Periskope.
Generating an API Key 🔑
To authenticate you need to add an Authorization header with the contents of the header being Bearer <token>
where <token>
API Key.
Login to your account
To generate an API key for your zap, you must have a periskope account. If you don’t have one, you can sign up for a free trial here.
Generate API Key
Navigate to the API section and click on ‘Generate API Key’ or click to visit here. API key can only be revealed once, so please keep this API key safe and at a secure place.
API settings
Setting up APIs on Postman 🔗
Search for Periskope API Collection (Postman)
To begin, search for the Periskope Platform API
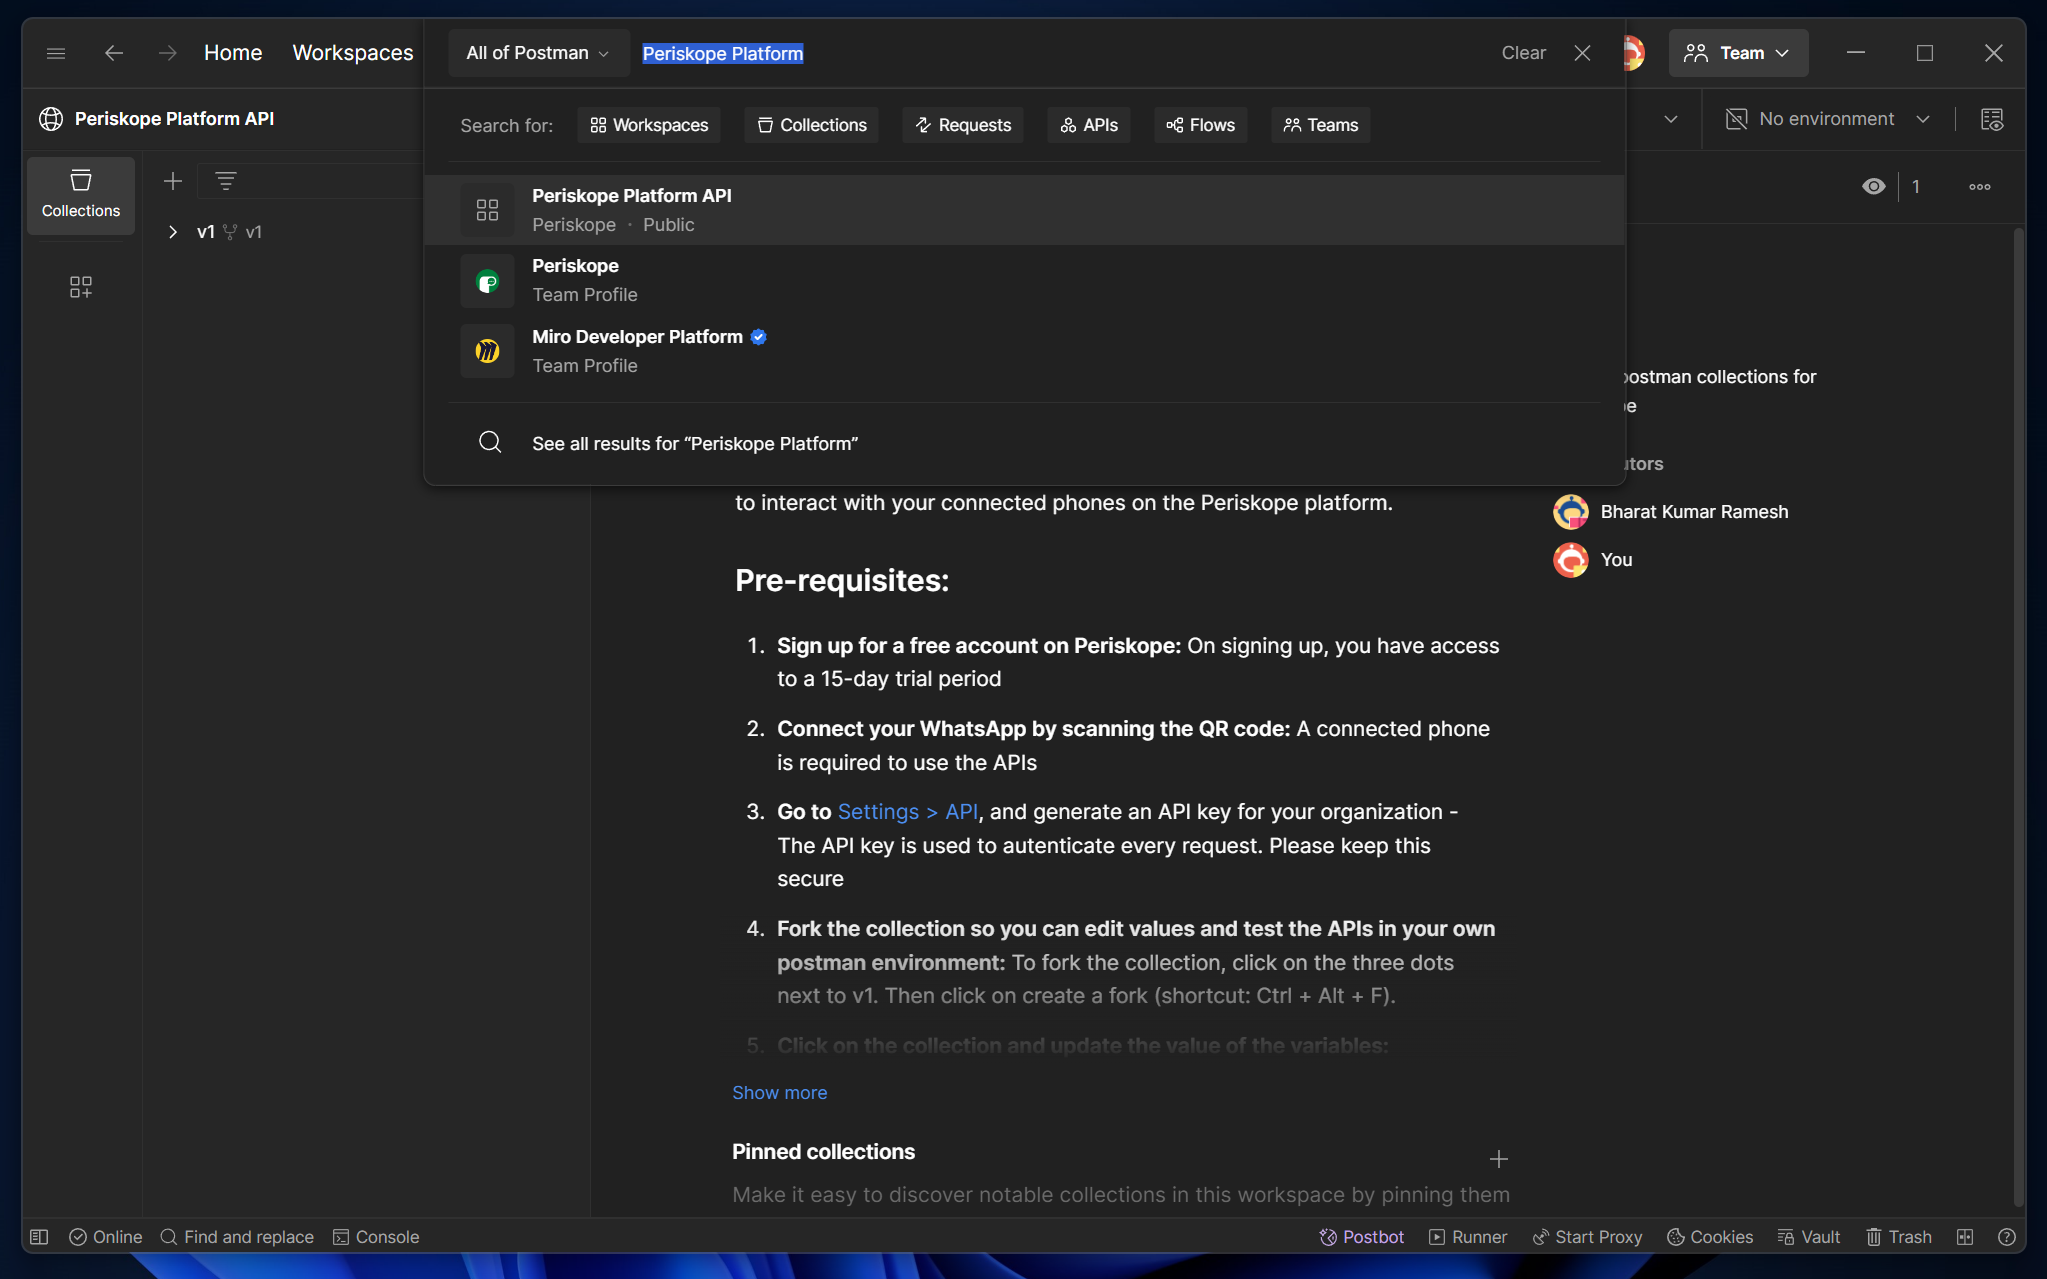
collection on Postman or
click here to
view.
This collection contains all the requests you need to work with our API.
Search Periskope Platform API
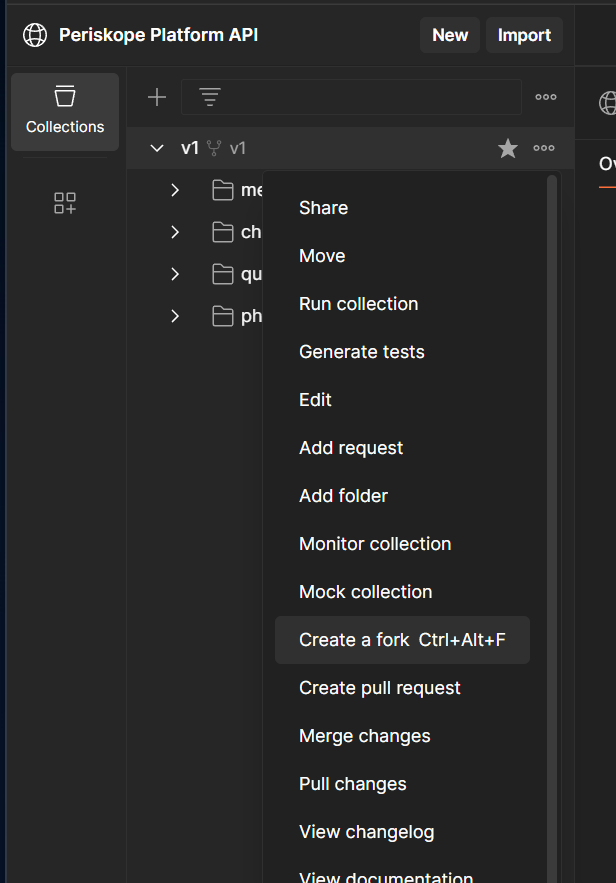
Create a fork
- To fork the collection, right click on the collection.
- Click on the
Create a Fork
button in the menu. - Now you can choose
name
of the collection and theworkspace
you want to add it to. - This will fork the collection into
your workspace
Create a fork
Add headers
For Postman
users,
Don’t worry, we’ve made setting up testing for Periskope APIs on Postman
easy for you.
You don’t need to pass x-phone
or authorization
header with each request.
You’ll just need to update orgPhone
and apiKey
in the collection variables in order to automatically pass the headers into each request.
In case, you’re using any other tools for testing APIs, you’ll need to pass the headers manually for each request.
If you’re using Postman, follow the steps given below -
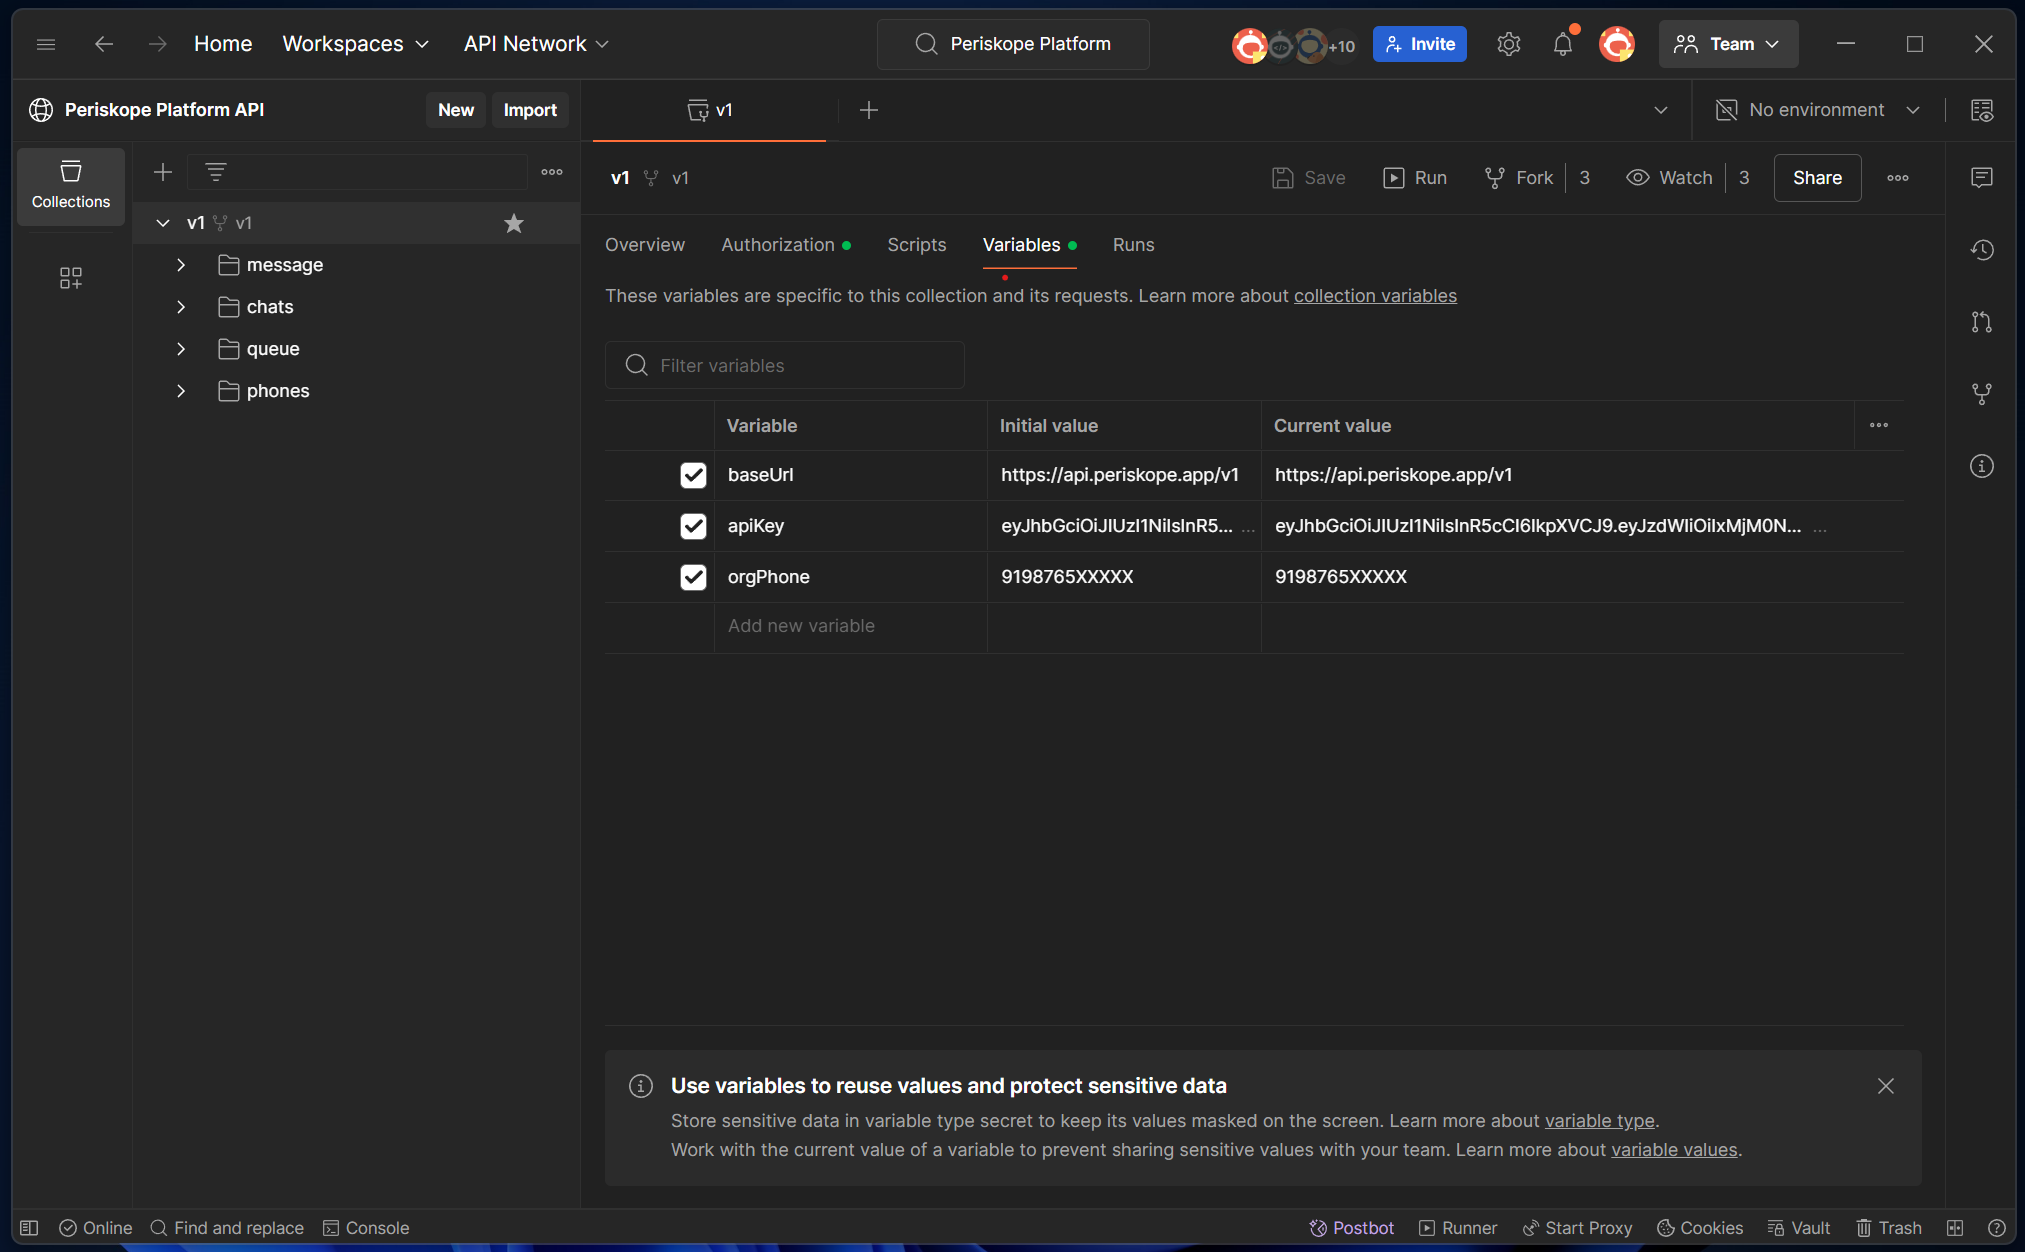
Update collection variables
- You need to add
apiKey
andorgPhone
variables in the collection. You can do this by clicking on the collection and then clicking on theVariables
tab. - In the
Variables
tab, update the value of theapiKey
you generated in the previous step. - You also need to update the value of
orgPhone
with your phone number (with country code and without any special characters) to validate an API request. For e.g.919876512340
.
Done ✅
That’s it! Now you can start testing the Periskope APIs from your Postman collection.
Update collection variables
If you’re using any other tools for testing APIs, follow the steps given below -
Add "authorization" header
- You need to add an
apiKey
variable in the collection. You can do this by clicking on the collection and then clicking on theVariables
button. In theVariables
tab, update the value of the apiKey you generated in the previous step.
Add "x-phone" header
- Along with api key in
Authorization
header, you need to passx-phone
header with your phone number to validate an API request.
In x-phone
header, you need to pass an active organisation phone number with
country code and without any special characters. For e.g. 919876512340
Result 🚀
Thats it! Now the Periskope APIs are ready to be tested from your postman collection.
Was this page helpful?