Labels help you organise and categorise your chats in Periskope. You can create custom labels with colours, apply them to chats, and filter your inbox by label — making it easy to segment conversations by topic, priority, customer type, or any system that works for your team.Documentation Index
Fetch the complete documentation index at: https://docs.periskope.app/llms.txt
Use this file to discover all available pages before exploring further.
Creating a Label
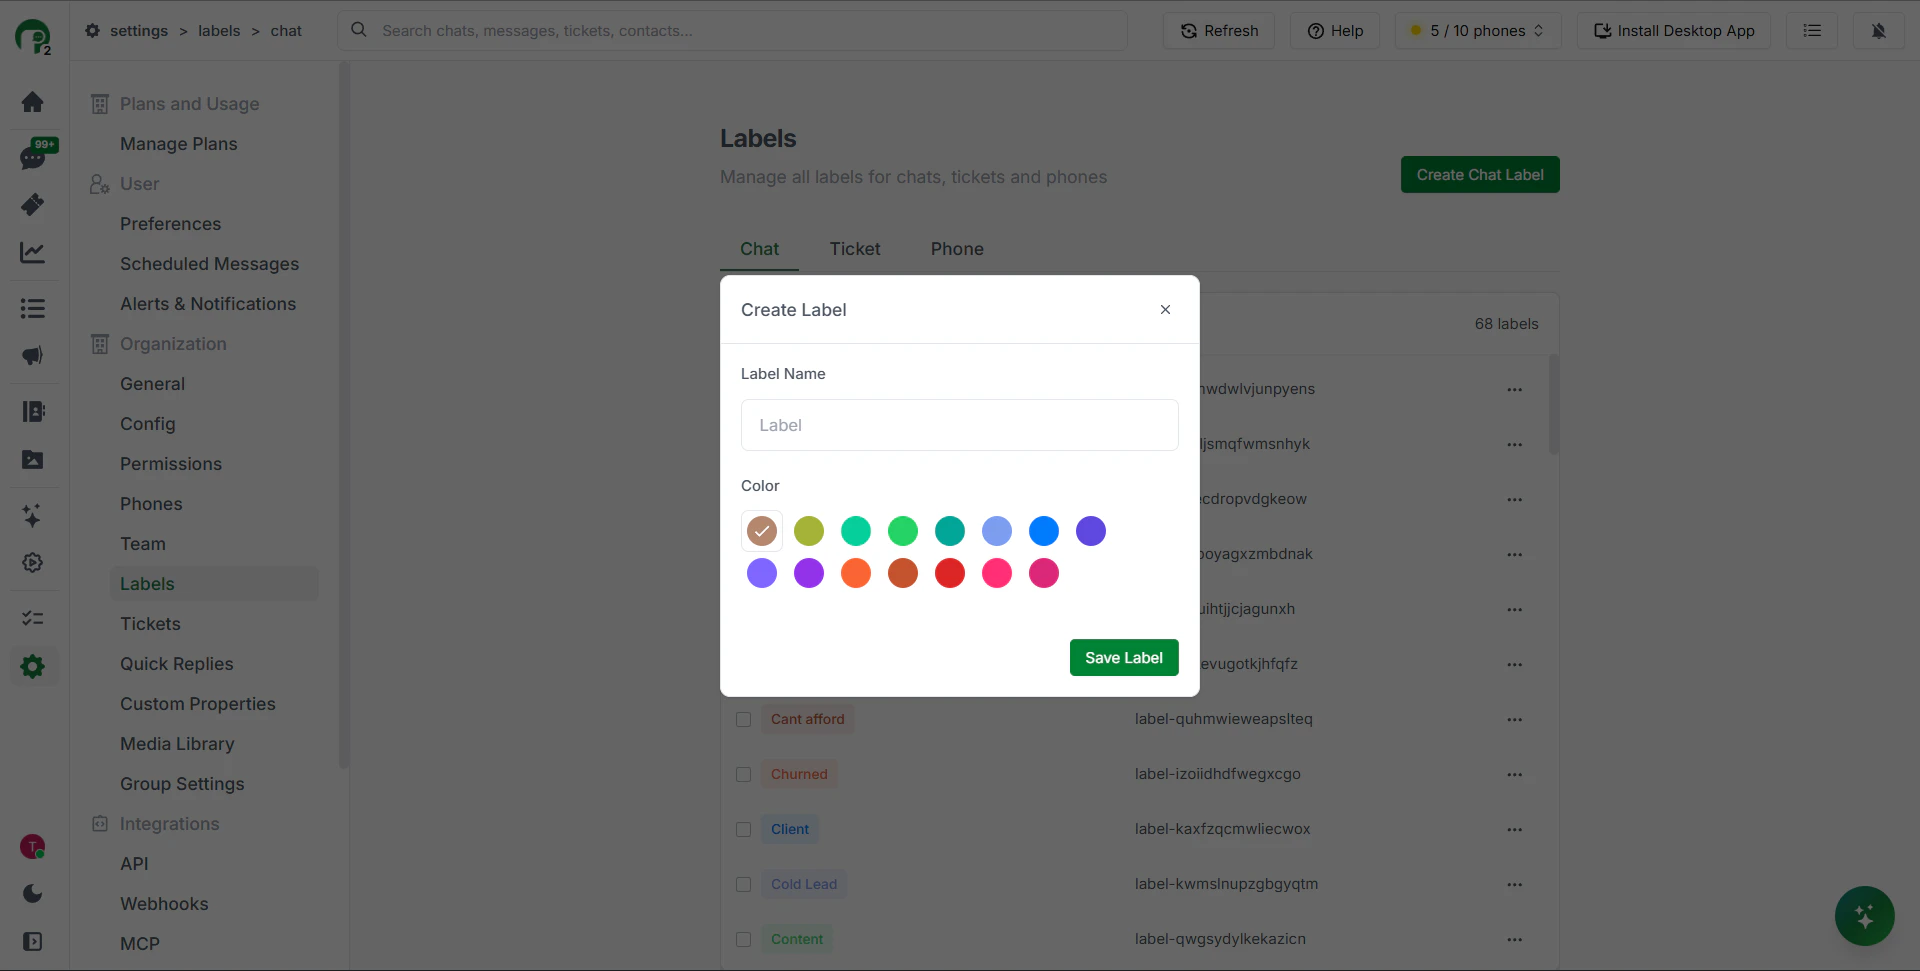
Labels are created from your organisation settings.- Go to Settings from the left sidebar
- Under the Organisation section, click Labels
- Click Create Chat Label
- Enter a name for the label
- Choose a colour
- Click Save Label
Applying a Label to a Chat
Labels are applied from inside an open chat via the right panel.- Open any chat
- In the right-side panel, go to the Overview tab
- Find the Labels section
- Click to add a label — you can apply multiple labels to the same chat
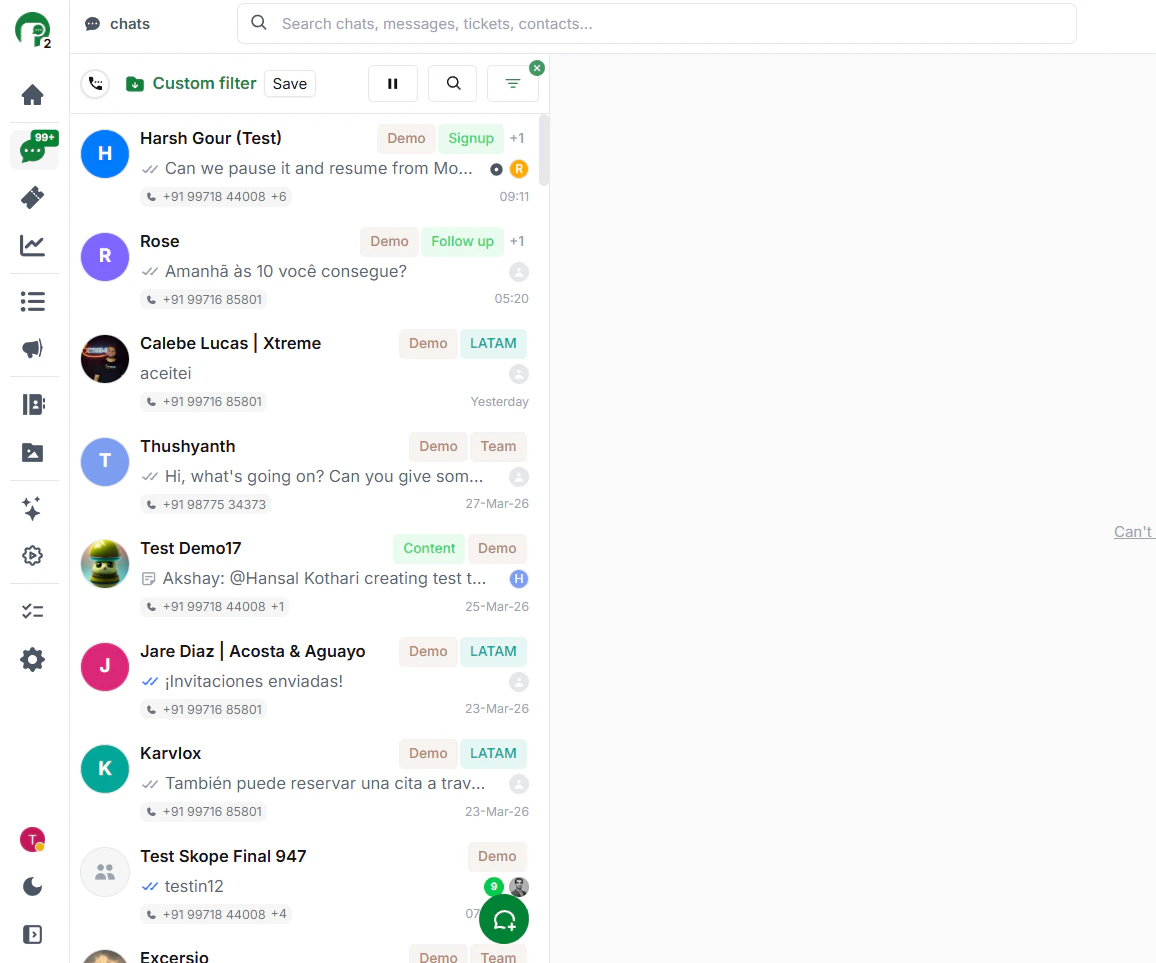
Note: A single chat can have multiple labels applied at the same time. For example, a chat could be labelled both “Demo” and “Escalated” simultaneously.
Filtering Chats by Label
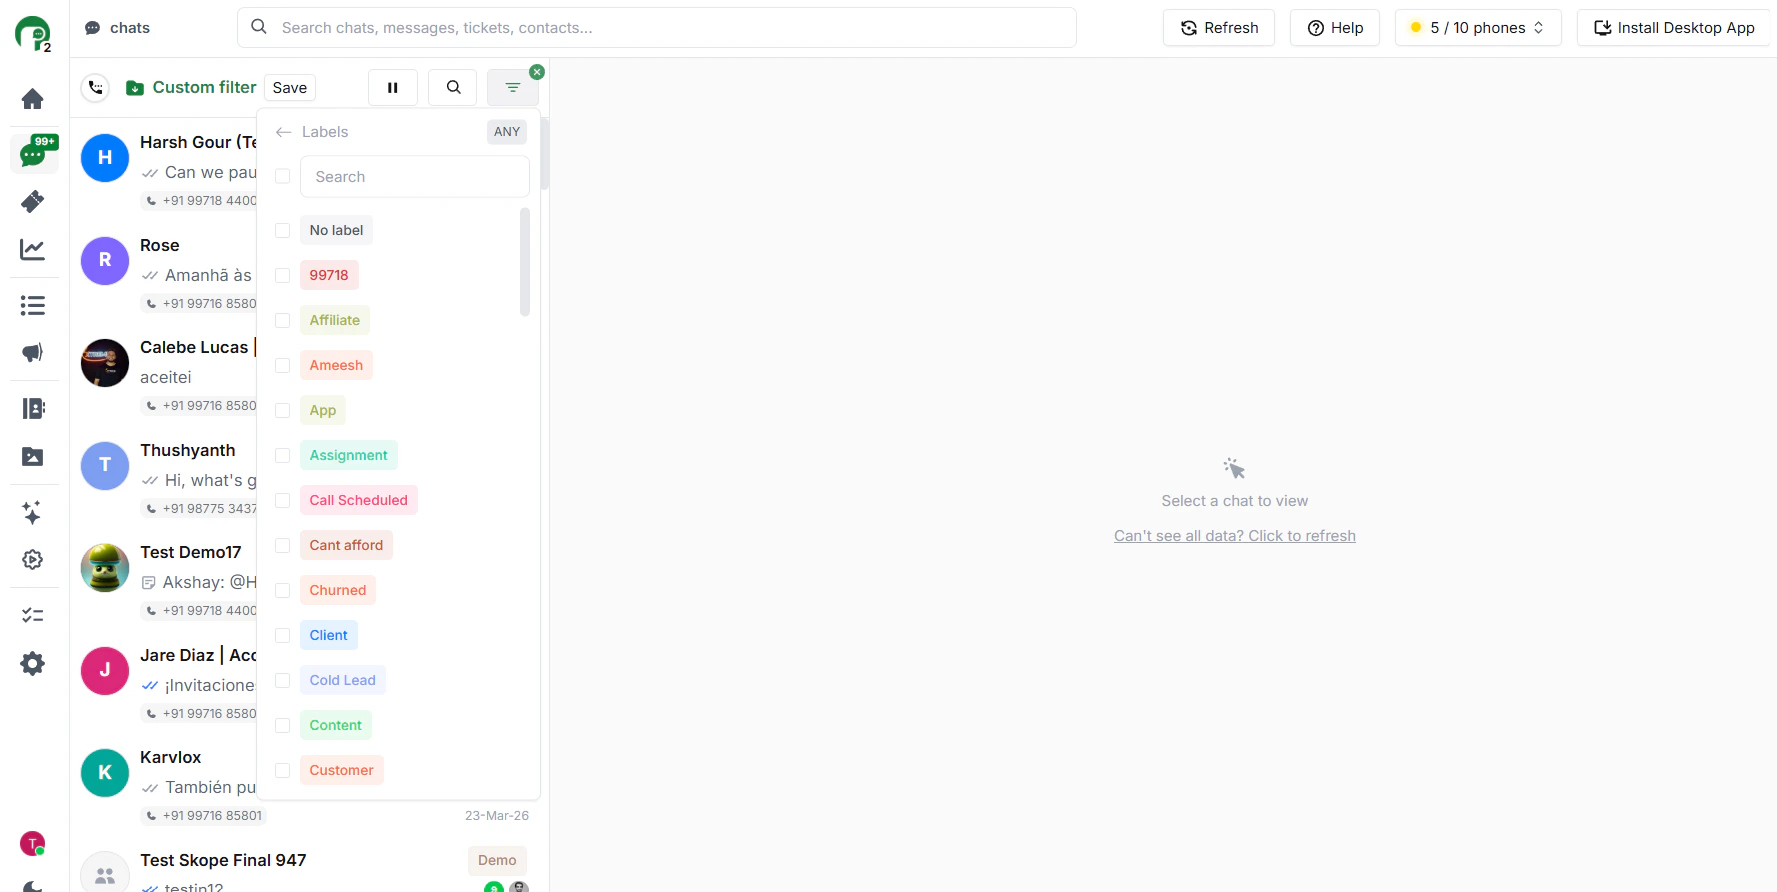
Once labels are applied, you can use them to filter your chat inbox.- Go to the Chats section
- Click the Filter icon at the top of the chat list
- Under Filter condition, select Labels
- Choose the label you want to filter by