Built-in Tools
Configure the AI Agent’s built-in tools and automation capabilities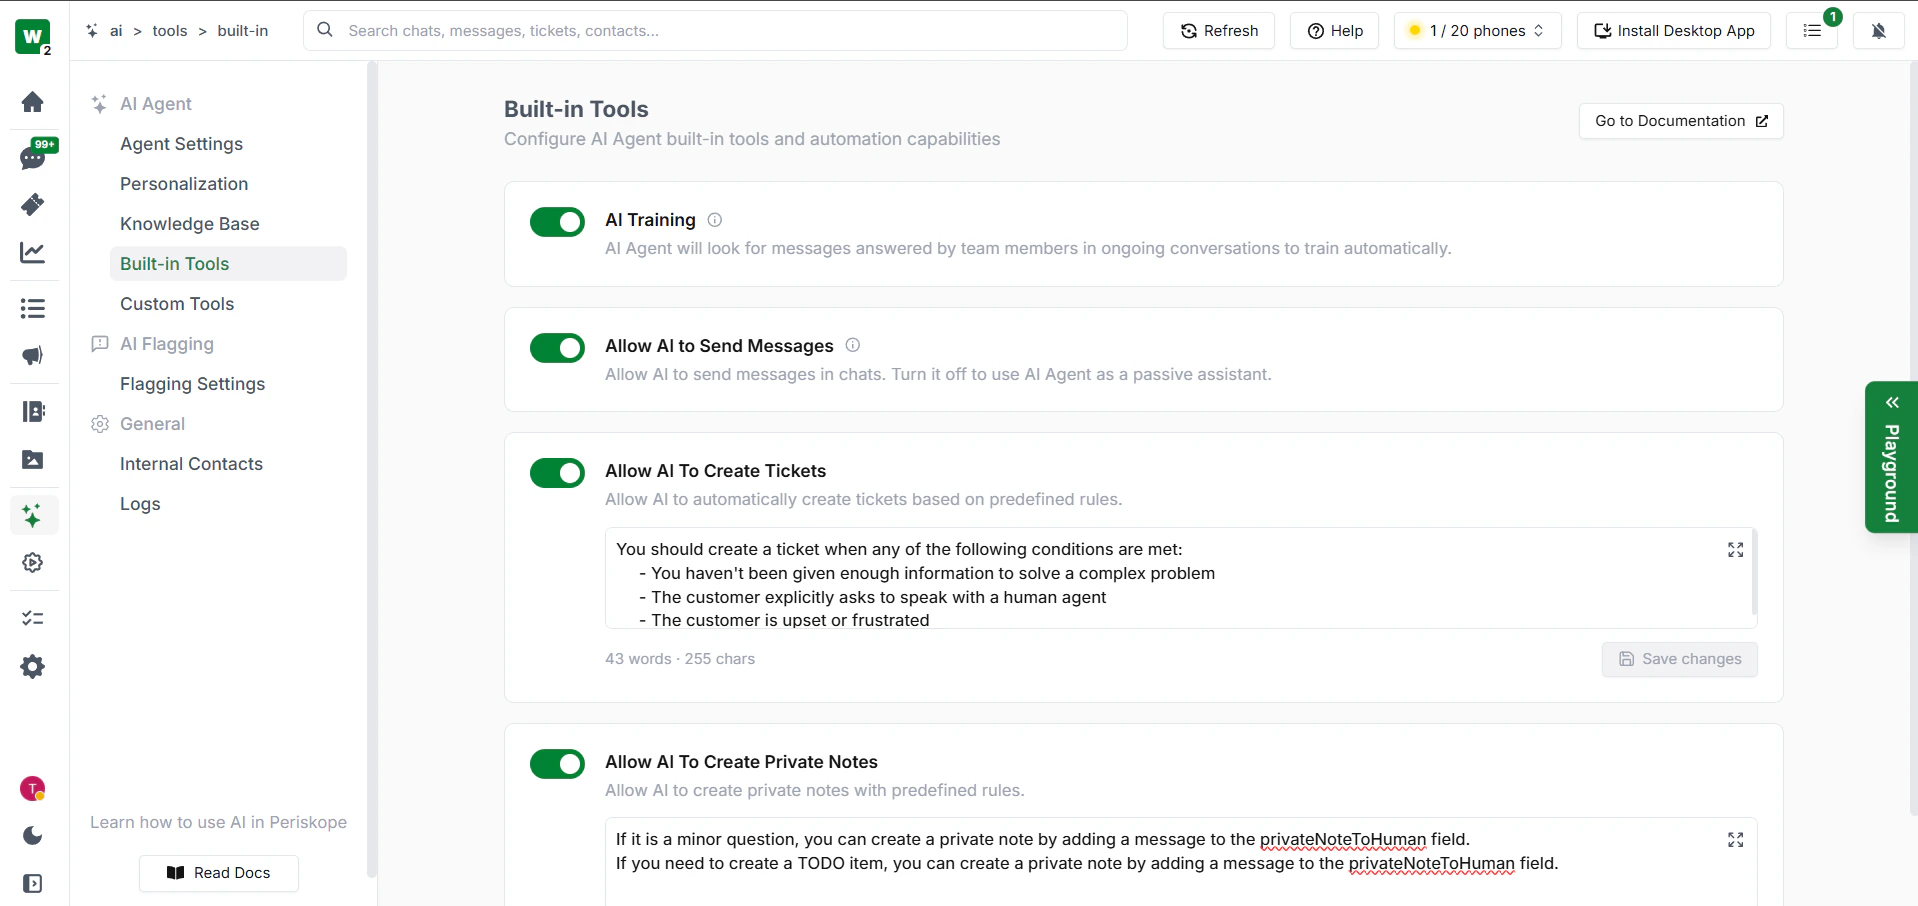
AI Training
- The AI Agent will automatically look for messages left unanswered by team members in ongoing conversations
- Uses these unanswered messages to train and improve itself over time
Allow AI to Send Messages
- When enabled, the AI Agent is permitted to send messages directly to customers
- Disable this if you want the AI to only assist internally without responding to customers directly
Allow AI to Create Tickets
- Allows the AI to automatically create tickets based on the situation and conversation context
- Tickets are used for issues where features are not working as expected, and complaints or problems the customer is facing
- The AI should create a ticket when any of the following conditions are met:
- The AI has not been given enough information to solve a complex problem
- The customer explicitly asks to speak with a human agent
- The customer is upset or frustrated
Important: The AI must never create a ticket if a ticket has already been raised in the same conversation on the same topic. Instead of creating a duplicate ticket, the AI should respond to the customer directly.
Allow AI to Create Private Notes
- Allows the AI to create private notes visible only to your internal team
- For minor questions or TODO items for the team, the AI can create a private note using the
privateNoteToHumanfield
Custom Tools
- Custom tools allow you to extend the AI Agent’s capabilities by connecting it to your own external systems and endpoints
- Click Add New Tool to create a new tool and fill in the following sections\
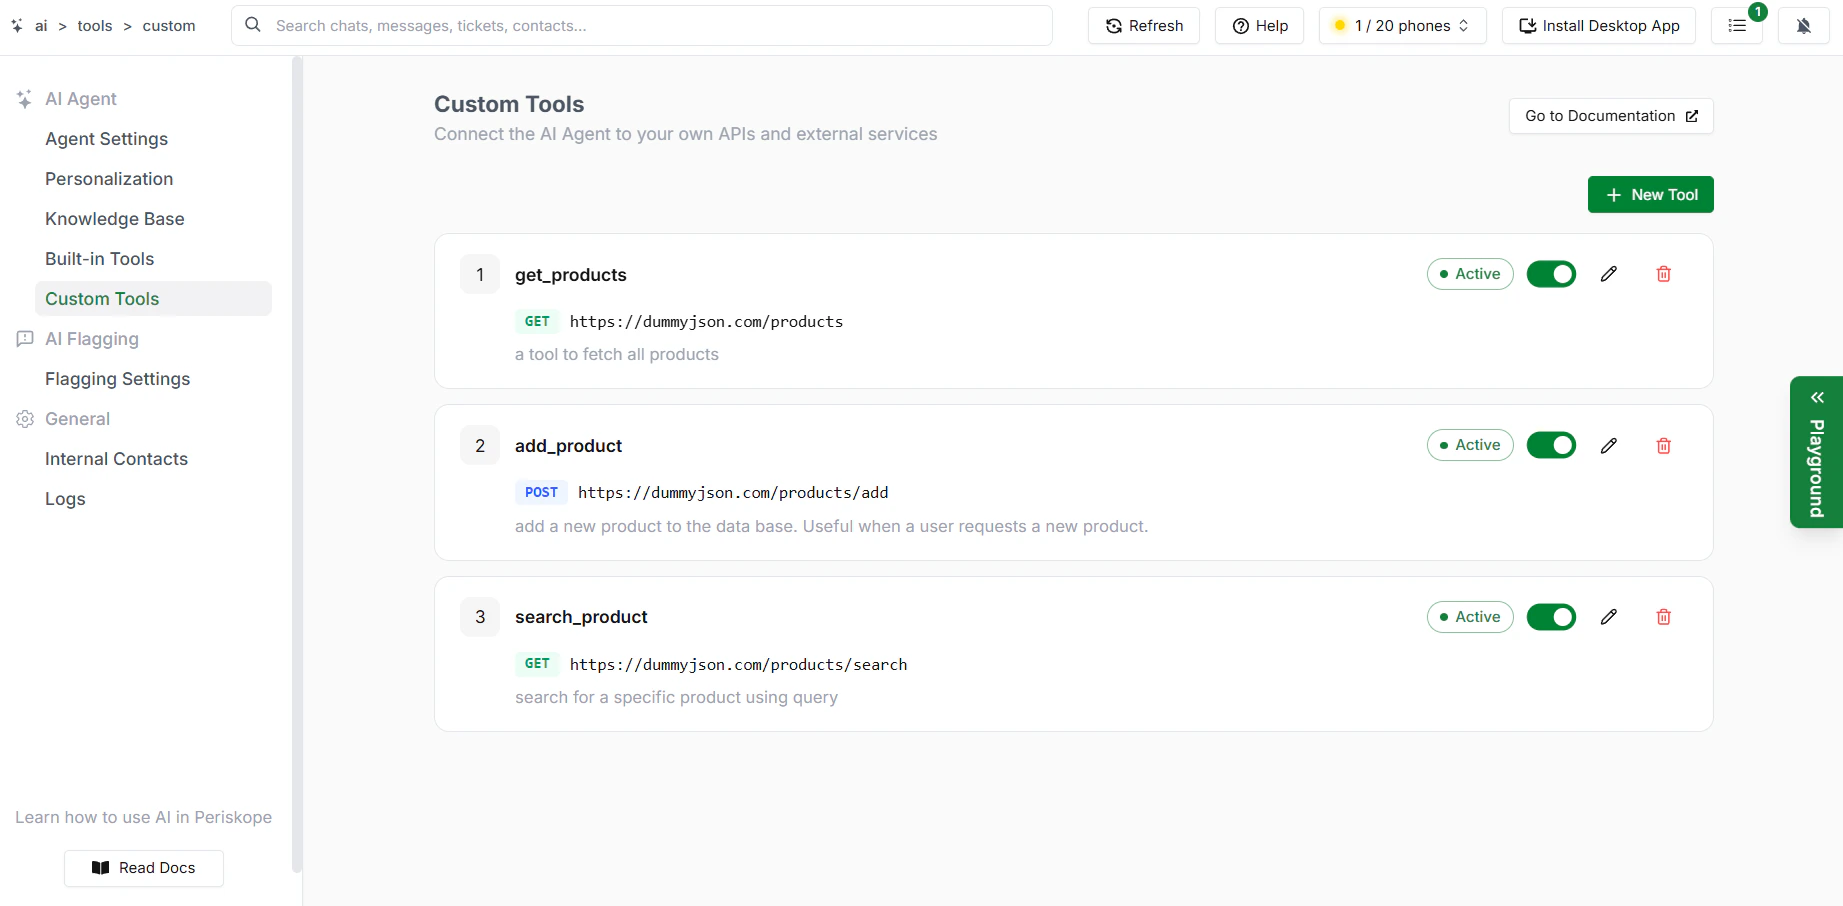
Basic Information
- Give your tool a name using snake_case with no spaces — the AI sees this name when deciding which tool to call
- Add a clear description so the AI knows exactly when to use this tool
- Select your HTTP method and provide the endpoint URL the AI will call
Authentication
- Configure how the AI will authenticate requests to your endpoint
- Choose from the following options:
- No Auth — for public endpoints that require no authentication
- Bearer Token — sends an
Authorization: Bearer {token}header - API Key — sends a custom header with a key-value pair
- Basic Auth — encodes username and password as a Base64 header
Request Headers
- Add static headers that will be sent with every call to this endpoint
- Authentication headers are managed separately in the Authentication section above
Parameters
- Define the inputs the AI will provide when calling this tool
- For each parameter, specify the name, type, location, and whether it is required
- Use available contexts to pass conversation data directly into your tool
Response Schema (Optional)
- Describe the shape of the API response so the AI can interpret and use the result accurately
- If left disabled, the AI will process the raw response directly
- Once all fields are filled in, click Create Tool to save and activate it