> ## Documentation Index
> Fetch the complete documentation index at: https://docs.periskope.app/llms.txt
> Use this file to discover all available pages before exploring further.
# Create a Task
> Convert any WhatsApp message into a task with one click. Instantly create, assign, and manage tasks without leaving the chat.
## Overview
You are managing multiple WhatsApp conversations. Important messages come in every day, but they often get buried in chats. You either try to remember them, scroll back later, or manually copy them into another tool. This process is time-consuming and easy to miss, leading to forgotten tasks and missed follow-ups. Create tasks directly from WhatsApp messages with a single click with the help of Periskope. No switching tools. No manual copying. All message context is automatically included, tasks are assigned instantly, and your team stays aligned on what needs to be done.
## How It Works
Creating a task from a WhatsApp message is simple:
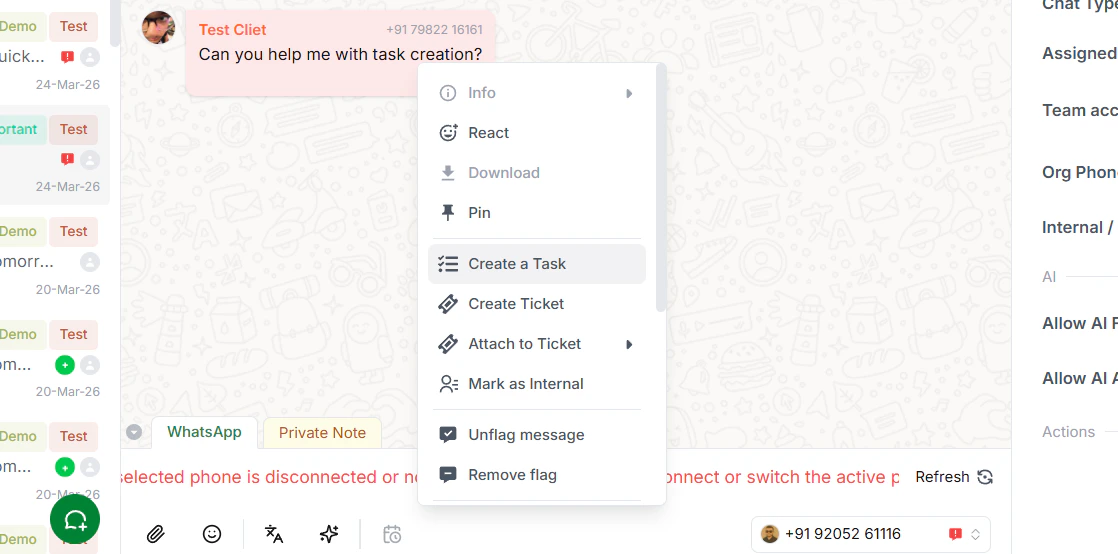
* Find the message you want to convert
* Right-click and select Create Task
* Fill in task details (name, assignee, priority, etc.)
* Click Save
* Task is created and linked to the message
The original message stays connected to the task, so you always have full context without needing to search again.
## Step-by-Step Guide:
Open the WhatsApp conversation and locate the message you want to convert into a task. This could be a request, reminder, or any action item that needs tracking.
Right-click (or long-press on mobile) on the message. A menu will appear. Select Create Task from the available options.
Enter a clear and descriptive name for your task. This helps everyone understand what needs to be done at a glance.
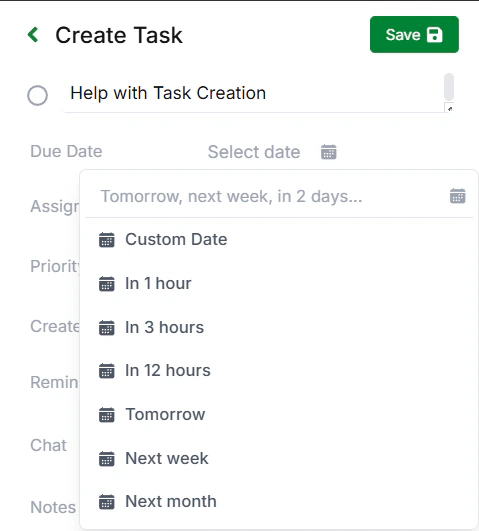
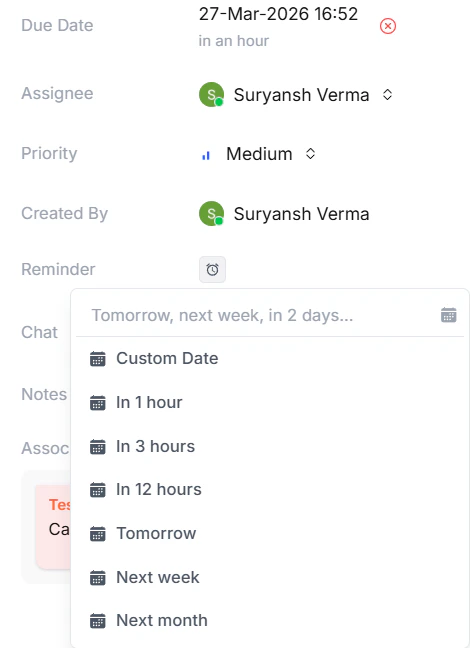
Choose a due date and estimate how much time is required to complete the task. This helps in planning and prioritization. You can set predetermined time/date or add your own custom dates.
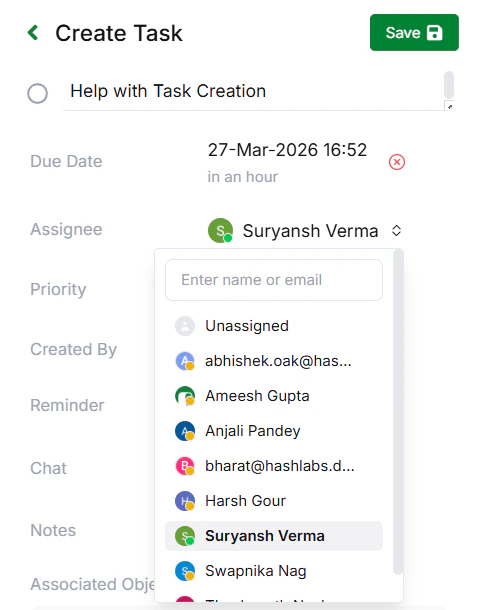
Select the person responsible for completing the task. Assigning ownership ensures accountability and faster execution.
Choose between Low, Medium, or High priority depending on urgency. This helps your team focus on what matters most.
Set reminders so the assignee gets notified at the right time. This ensures tasks are not forgotten. You can set predetermined time/date or add your own custom dates.
Include any additional context or instructions that may help complete the task more effectively.
Review all details and click Save. The task is created and linked to the original message. Notifications are sent automatically.
## Create Tasks Without Messages
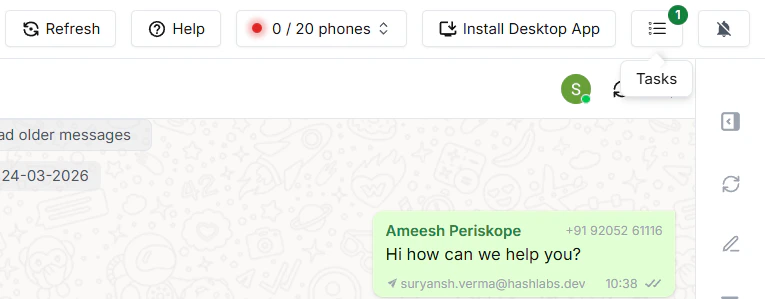
You can also create tasks from scratch using the Create Task button. Head to the top right of your Periskope dashboard, where you can find the tasks button. These tasks don’t need to be linked to a WhatsApp message. Use this for internal work, follow-ups, or starting new conversations.
## Managing Your Tasks
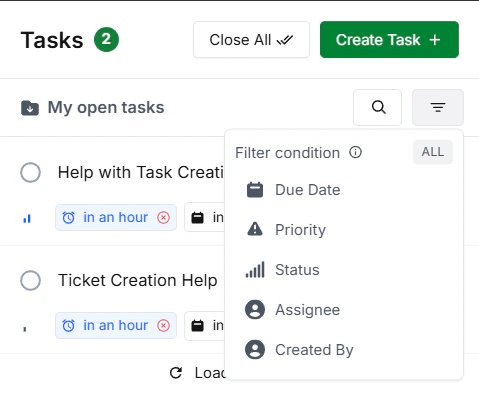
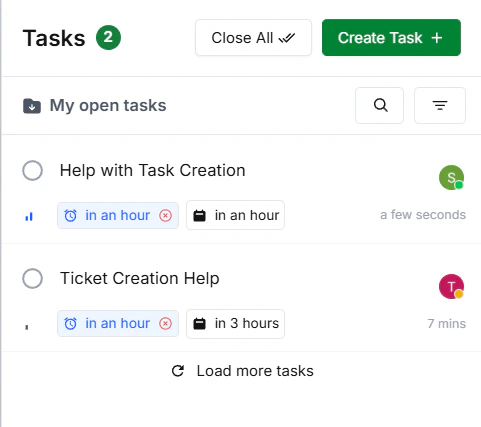
* **View All Tasks:** Go to the Tasks tab at the top right to see all your tasks. You can view your open tasks, all active tasks, tasks assigned to you, high priority tasks, and all tasks.
* **Track Progress:** Monitor active tasks and update them as work progresses.
* **Close Tasks:** Mark tasks as completed once they are done to keep your workspace clean and organized.
* **Filter tasks:** Filter out the tasks that aren't needed and only view those that are important. You can filter by due date, priority, assignee, or status to quickly find what you need.
 ## Managing Your Tasks
* **View All Tasks:** Go to the Tasks tab at the top right to see all your tasks. You can view your open tasks, all active tasks, tasks assigned to you, high priority tasks, and all tasks.
## Managing Your Tasks
* **View All Tasks:** Go to the Tasks tab at the top right to see all your tasks. You can view your open tasks, all active tasks, tasks assigned to you, high priority tasks, and all tasks.
 * **Track Progress:** Monitor active tasks and update them as work progresses.
* **Close Tasks:** Mark tasks as completed once they are done to keep your workspace clean and organized.
* **Filter tasks:** Filter out the tasks that aren't needed and only view those that are important. You can filter by due date, priority, assignee, or status to quickly find what you need.
* **Track Progress:** Monitor active tasks and update them as work progresses.
* **Close Tasks:** Mark tasks as completed once they are done to keep your workspace clean and organized.
* **Filter tasks:** Filter out the tasks that aren't needed and only view those that are important. You can filter by due date, priority, assignee, or status to quickly find what you need.