> ## Documentation Index
> Fetch the complete documentation index at: https://docs.periskope.app/llms.txt
> Use this file to discover all available pages before exploring further.
# Actions
### Overview ℹ️
Actions are the tasks executed when the criteria are satisfied. Each action can be delayed, allowing it to be executed at a specific time.
Available Actions:
1. **Send Message** - Send a message to a chat or group.
2. **Forward Message** - Forward a message to another chat.
3. **Flag Message** - Flag a message in Periskope.
4. **Unflag Message** - Unflag a message in Periskope.
5. **Delete Message** - Delete a message from a chat.
6. **Create Ticket** - Create a new ticket in Periskope.
7. **Assign Ticket** - Assign a ticket to a user.
8. **Close Ticket** - Close a ticket in Periskope.
9. **Add Ticket Label** - Add one or more labels to a ticket.
10. **Add Chat Label** - Add one or more labels to a chat.
11. **Assign Chat** - Assign a chat to a user.
12. **Send Email** - Send an email to a user.
The available actions may vary based on the triggers selected. Not all actions are available for all triggers.
You can add multiple actions to a rule and set delays for each action.
### 1. Send Message To Chat 📩
The **Send Message** action allows you to send a message to a chat or group. You can customize the message content and choose the chat or group to send the message to.
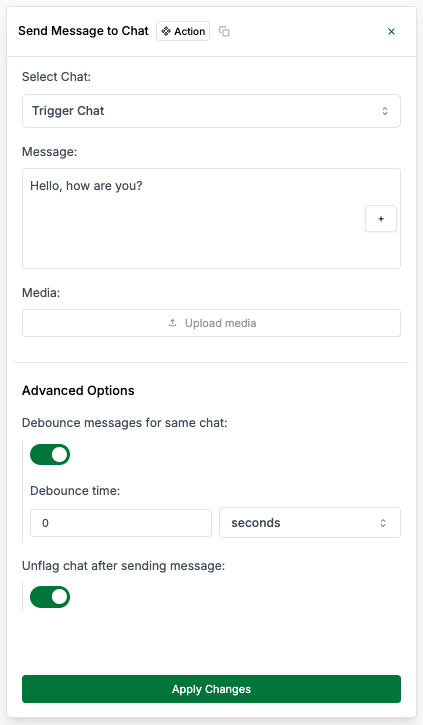 **Action Inputs**
The chat or group to send the message to. You can search for the chat from the dropdown.
If you want to send the message to the same chat in which the workflow is triggered, you can select trigger chat from the dropdown.
The message content to be sent. You can add variables to personalize the message.
Example: `Hello {{ chat.chat_name || '' }}, your request has been received.`
Optional media file to attach to the message. You can upload an image, video, document, or other supported file type.
Whether to enable a cooldown period after sending the message. You can set a
cooldown period to prevent sending multiple messages in quick succession.
The duration of the cooldown period. You can specify the period in seconds,
minutes, hours, or days.
Option to maintain the flag status of the previous messages after sending the
message.
You can add variables to the message content to personalize the message.
Variables are placeholders that are replaced with actual values when the
message is sent and if the variable is not available, the fallback value is
used. Use variables to include dynamic information in the message, such as the
chat name, sender name, or ticket ID.
### 2. Forward Message 📩⏩
The **Forward Message** action allows you to forward a message to another chat.
**Action Inputs**
The chat or group to send the message to. You can search for the chat from the dropdown.
If you want to send the message to the same chat in which the workflow is triggered, you can select trigger chat from the dropdown.
The message content to be sent. You can add variables to personalize the message.
Example: `Hello {{ chat.chat_name || '' }}, your request has been received.`
Optional media file to attach to the message. You can upload an image, video, document, or other supported file type.
Whether to enable a cooldown period after sending the message. You can set a
cooldown period to prevent sending multiple messages in quick succession.
The duration of the cooldown period. You can specify the period in seconds,
minutes, hours, or days.
Option to maintain the flag status of the previous messages after sending the
message.
You can add variables to the message content to personalize the message.
Variables are placeholders that are replaced with actual values when the
message is sent and if the variable is not available, the fallback value is
used. Use variables to include dynamic information in the message, such as the
chat name, sender name, or ticket ID.
### 2. Forward Message 📩⏩
The **Forward Message** action allows you to forward a message to another chat.
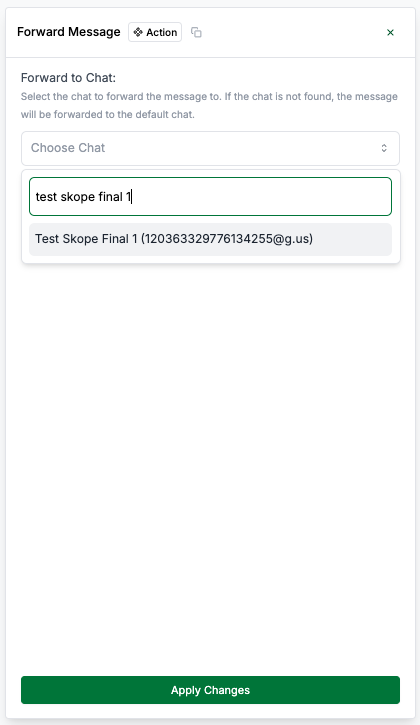 **Action Inputs**
The chat or group to forward the message to.
### 3. Flag Message 🚩
The **Flag Message** action allows you to flag or unflag a message in Periskope.
### 4. Unflag Message 🚩
The **Unflag Message** action allows you to unflag a message in Periskope.
### 5. Delete Message 🗑️
The **Delete Message** action allows you to delete a message from a chat.
This action is irreversible. Once a message is deleted, it cannot be recovered.
You can only delete messages if you have the necessary permissions.
### 6. Create Ticket 🎫
The **Create Ticket** action allows you to create a new ticket in Periskope.
**Action Inputs**
The chat or group to forward the message to.
### 3. Flag Message 🚩
The **Flag Message** action allows you to flag or unflag a message in Periskope.
### 4. Unflag Message 🚩
The **Unflag Message** action allows you to unflag a message in Periskope.
### 5. Delete Message 🗑️
The **Delete Message** action allows you to delete a message from a chat.
This action is irreversible. Once a message is deleted, it cannot be recovered.
You can only delete messages if you have the necessary permissions.
### 6. Create Ticket 🎫
The **Create Ticket** action allows you to create a new ticket in Periskope.
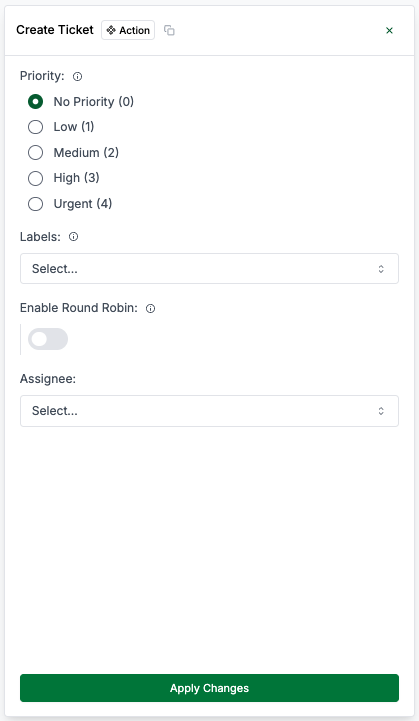 **Action Inputs**
The priority of the ticket. You can choose from No Priority, Low, Medium, High, or
Urgent. Only applicable when creating a new ticket.
The labels to add to the ticket. You can add multiple labels by selecting from
the dropdown. Only applicable when creating a new ticket.
The user to assign the ticket to. You can select the user from the dropdown. Only applicable when creating a new ticket.
You can assign ticket to user from a list on round-robin basis as well.
### 7. Assign Ticket 🎫👤
The **Assign Ticket** action allows you to assign a ticket to a user.
**Action Inputs**
The priority of the ticket. You can choose from No Priority, Low, Medium, High, or
Urgent. Only applicable when creating a new ticket.
The labels to add to the ticket. You can add multiple labels by selecting from
the dropdown. Only applicable when creating a new ticket.
The user to assign the ticket to. You can select the user from the dropdown. Only applicable when creating a new ticket.
You can assign ticket to user from a list on round-robin basis as well.
### 7. Assign Ticket 🎫👤
The **Assign Ticket** action allows you to assign a ticket to a user.
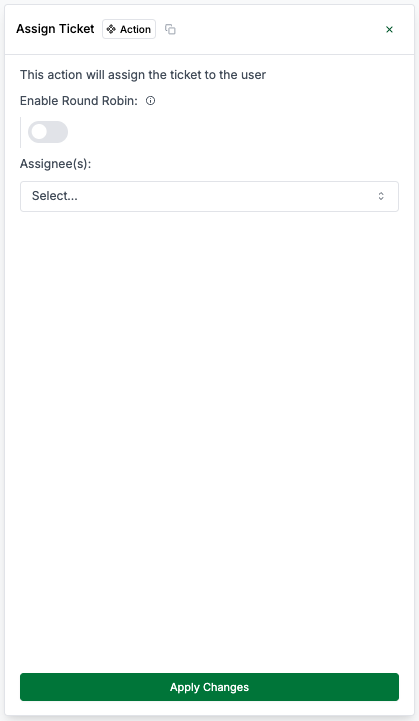 **Action Inputs**
Whether to assign the ticket using the round-robin method. You can enable
round-robin assignment to distribute tickets evenly among users.
The user(s) to assign the ticket to. You can select multiple users by selecting from the dropdown.
If round-robin assignment is enabled, you can select multiple users to assign tickets to.
### 8. Close Ticket ❌
The **Close Ticket** action allows you to close a ticket in Periskope.
**Action Inputs**
The note to add when closing the ticket.
### 9. Add Ticket Label Action 🎫🏷️
The **Add Ticket Label** action allows you to add one or multiple label to a ticket.
**Action Inputs**
Whether to assign the ticket using the round-robin method. You can enable
round-robin assignment to distribute tickets evenly among users.
The user(s) to assign the ticket to. You can select multiple users by selecting from the dropdown.
If round-robin assignment is enabled, you can select multiple users to assign tickets to.
### 8. Close Ticket ❌
The **Close Ticket** action allows you to close a ticket in Periskope.
**Action Inputs**
The note to add when closing the ticket.
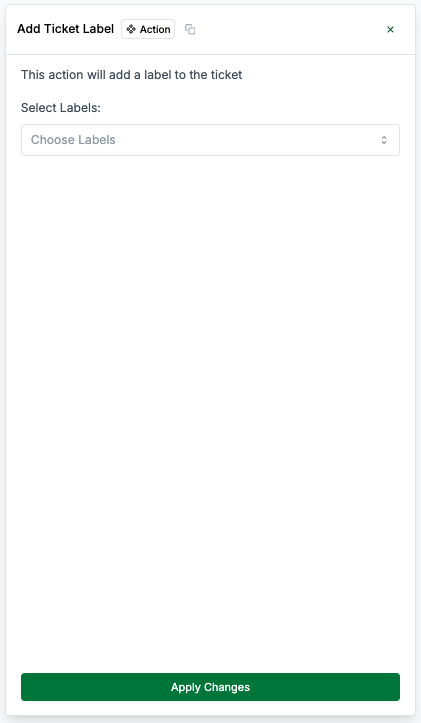
### 9. Add Ticket Label Action 🎫🏷️
The **Add Ticket Label** action allows you to add one or multiple label to a ticket.
 **Action Inputs**
The labels to add to the ticket. You can add multiple labels by selecting from
the dropdown.
### 10. Add Chat Label Action 💬🏷️
The **Add Chat Label** action allows you to add a label to a chat.
**Action Inputs**
The labels to add to the ticket. You can add multiple labels by selecting from
the dropdown.
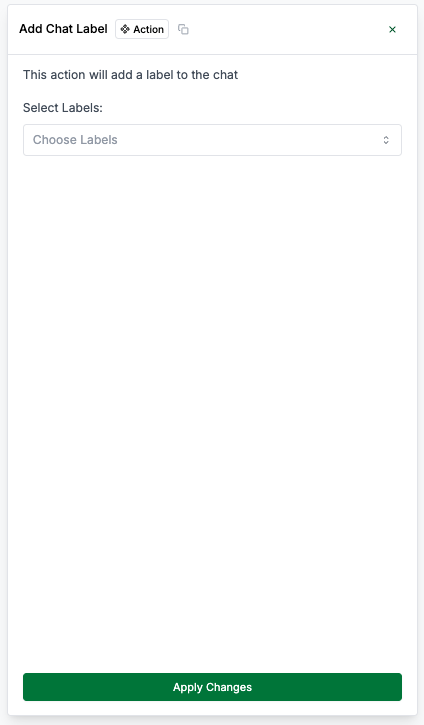
### 10. Add Chat Label Action 💬🏷️
The **Add Chat Label** action allows you to add a label to a chat.
 **Action Inputs**
The labels to add to the chat. You can add multiple labels by selecting from
the dropdown.
### 11. Assign Chat Action 💬👤
The **Assign Chat** action allows you to assign a chat to a user.
**Action Inputs**
The labels to add to the chat. You can add multiple labels by selecting from
the dropdown.
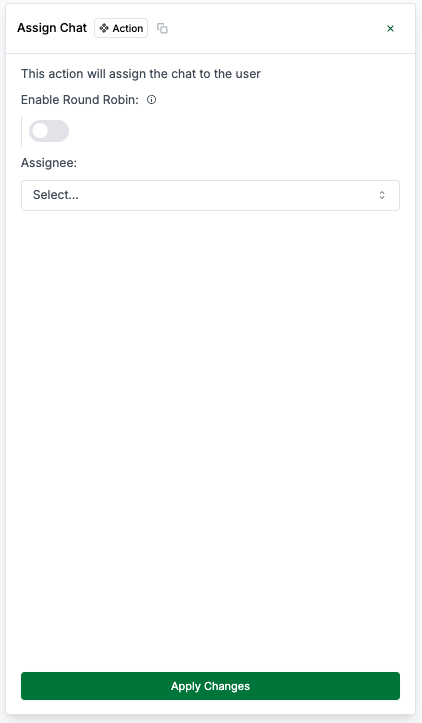
### 11. Assign Chat Action 💬👤
The **Assign Chat** action allows you to assign a chat to a user.
 **Action Inputs**
Whether to assign the chat using the round-robin method. You can enable
round-robin assignment to distribute chats evenly among users.
Round-robin assignment assigns chats to users in a circular order. Each user
receives a chat in turn, ensuring an even distribution of chats among users.
The user to assign the chat to. If round-robin assignment is enabled, you can
select multiple users to assign chats to.
### 12. Send Email Action 📧
The **Send Email** action allows you to send an email notification to any email address.
**Action Inputs**
Whether to assign the chat using the round-robin method. You can enable
round-robin assignment to distribute chats evenly among users.
Round-robin assignment assigns chats to users in a circular order. Each user
receives a chat in turn, ensuring an even distribution of chats among users.
The user to assign the chat to. If round-robin assignment is enabled, you can
select multiple users to assign chats to.
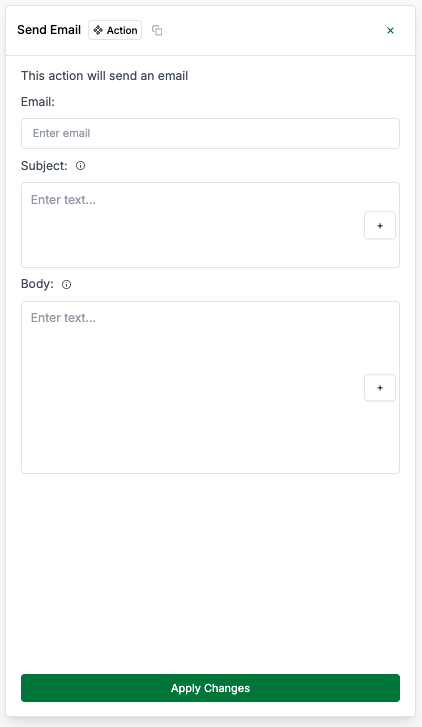
### 12. Send Email Action 📧
The **Send Email** action allows you to send an email notification to any email address.
 **Action Inputs**
The email address to send the email to.
The subject of the email. You can add variables to personalize the subject.
Example: `New ticket created: {{ ticket.ticket_id || '' }}`
You can add variables to the subject to personalize the email. Variables
are placeholders that are replaced with actual values when the email is sent
and if the variable is not available, the fallback value is used. Use
variables to include dynamic information in the subject, such as the ticket ID
or chat name.
The email content to be sent. You can add variables to personalize the email.
Example: `Hello, new ticket {{ ticket.ticket_id || '' }} has been assigned to you.`
You can add variables to the email body to personalize the email. Variables
are placeholders that are replaced with actual values when the email is sent
and if the variable is not available, the fallback value is used. Use
variables to include dynamic information in the email, such as the ticket ID,
chat name, or sender name.
**Action Inputs**
The email address to send the email to.
The subject of the email. You can add variables to personalize the subject.
Example: `New ticket created: {{ ticket.ticket_id || '' }}`
You can add variables to the subject to personalize the email. Variables
are placeholders that are replaced with actual values when the email is sent
and if the variable is not available, the fallback value is used. Use
variables to include dynamic information in the subject, such as the ticket ID
or chat name.
The email content to be sent. You can add variables to personalize the email.
Example: `Hello, new ticket {{ ticket.ticket_id || '' }} has been assigned to you.`
You can add variables to the email body to personalize the email. Variables
are placeholders that are replaced with actual values when the email is sent
and if the variable is not available, the fallback value is used. Use
variables to include dynamic information in the email, such as the ticket ID,
chat name, or sender name.