> ## Documentation Index
> Fetch the complete documentation index at: https://docs.periskope.app/llms.txt
> Use this file to discover all available pages before exploring further.
# Custom Properties for Tickets
Want to track extra details against every support issue — like urgency, product category, or resolution type? Custom Properties for Tickets in Periskope let you add any field your team needs, directly inside the ticket.
***
## Overview
Ticket Custom Properties allow you to add additional data fields to your tickets in Periskope. These properties appear inside the **ticket detail view**, enabling your team to capture and view important information for every issue they handle.
Properties are organised into **sections**, and ticket properties are configured independently from chat properties — so you can tailor each one to how your team works.
***
## Setting Up Ticket Custom Properties
### 1. Go to Settings → Custom Properties
Go to **Settings** from the left sidebar and click **Custom Properties** under the Organisation section.
***
### 2. Click on the Ticket tab
At the top of the page, click the **Ticket** tab to switch to ticket properties.
***
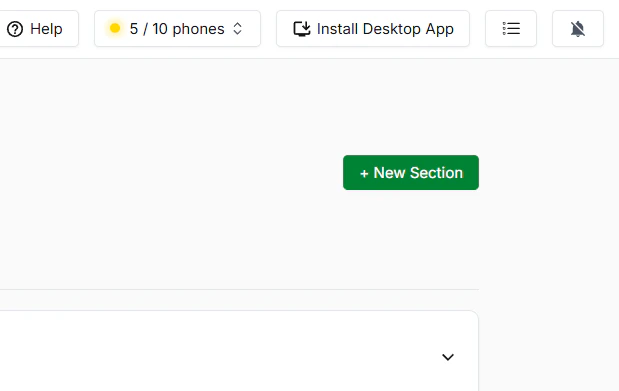
### 3. Create a new section
Properties are organised into sections. To create one:
1. Click **+ New Section** in the top right
2. Give the section a name — for example, "Issue Details" or "Resolution Info"
***
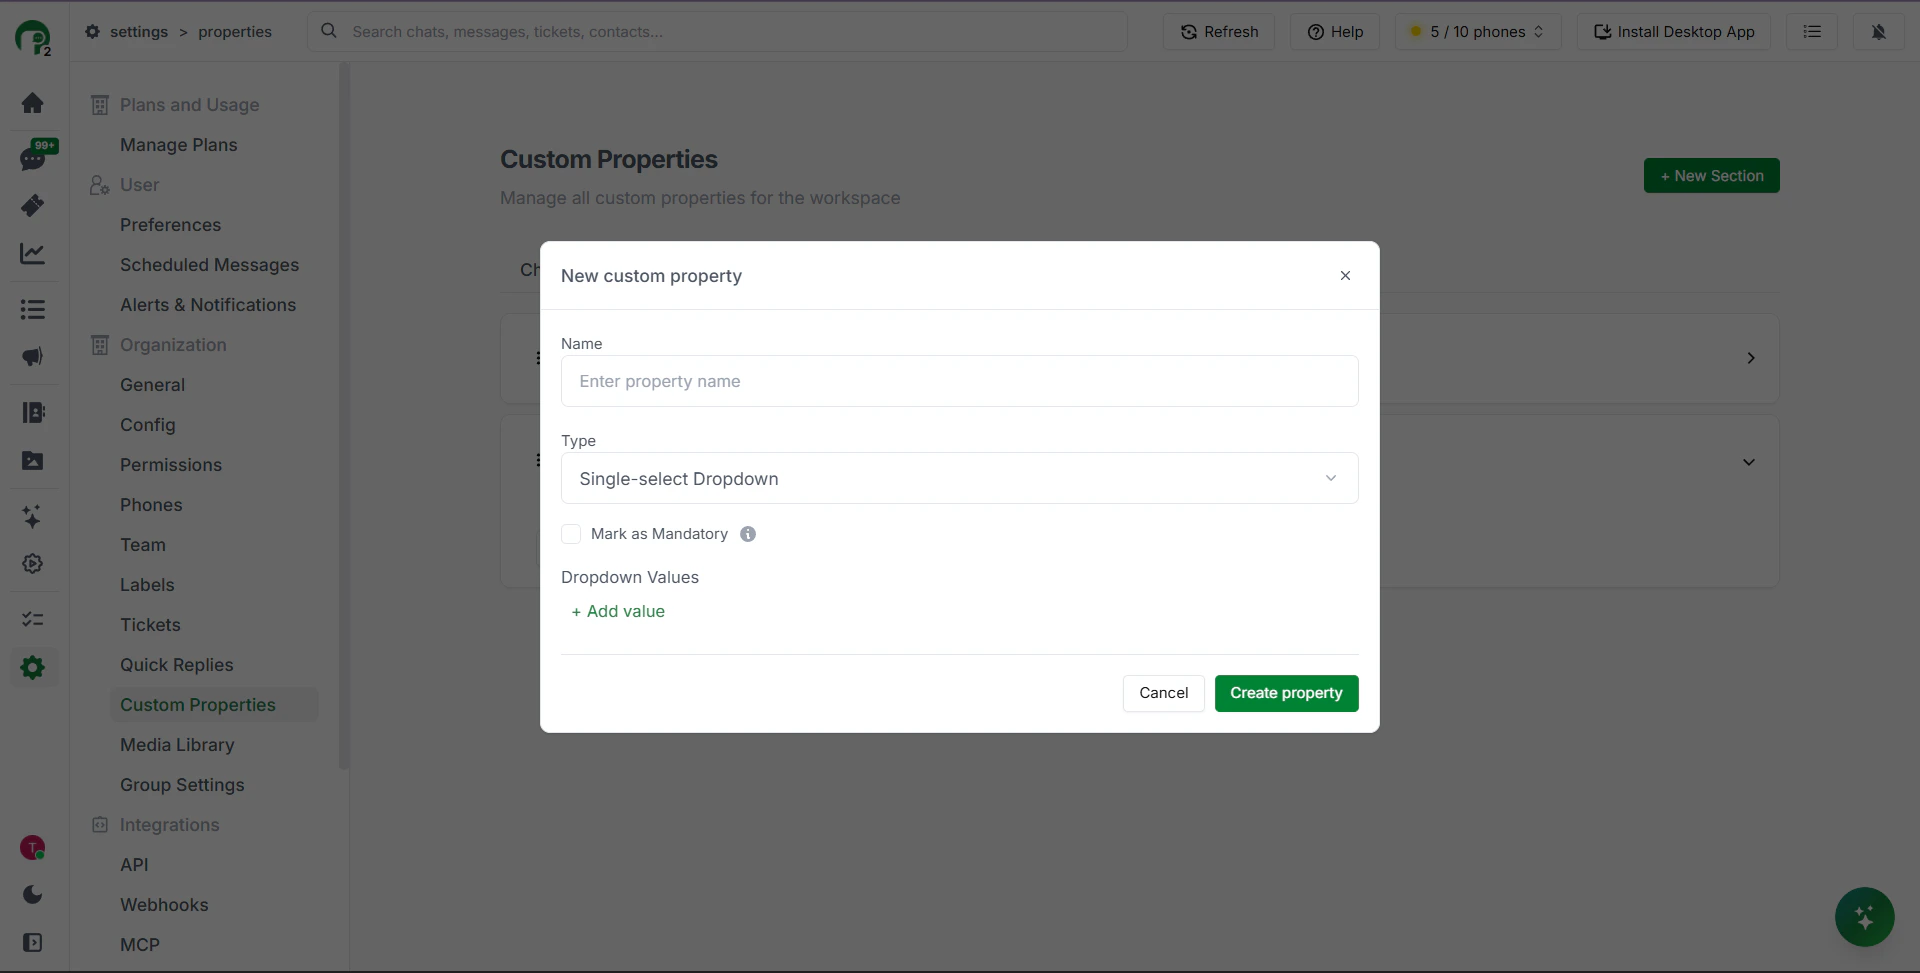
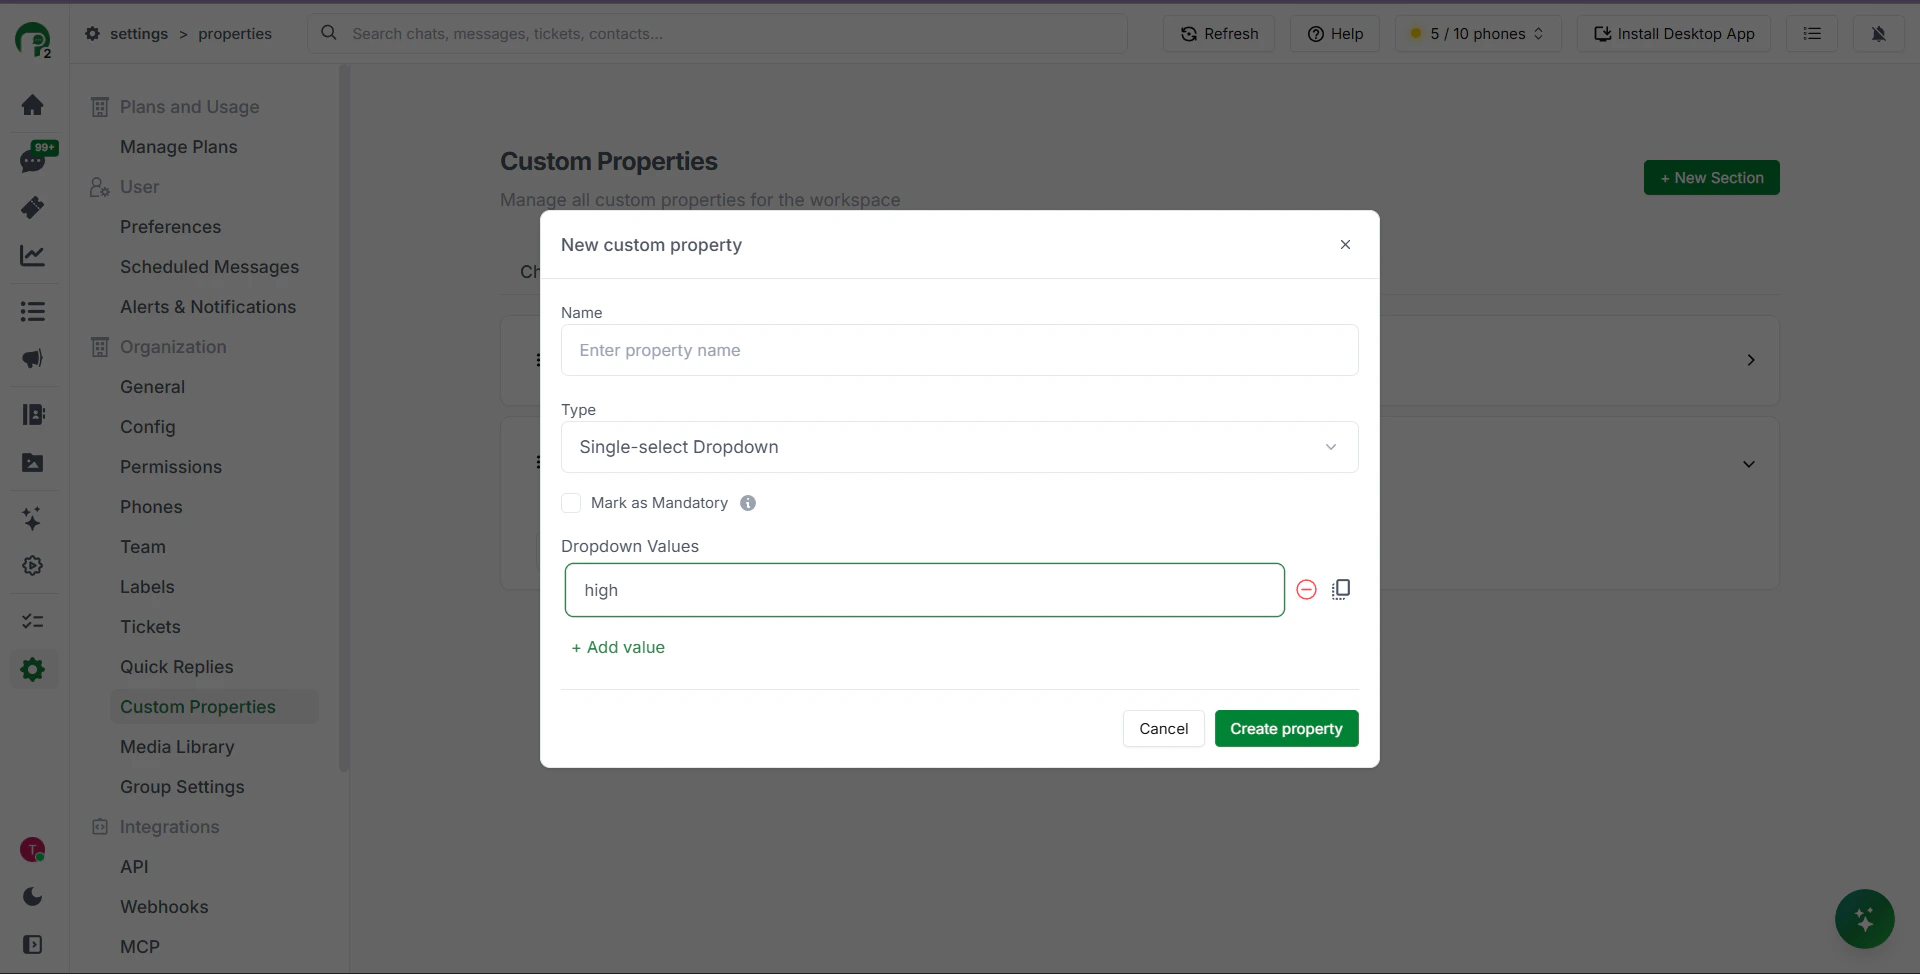
### 4. Add a property to the section
1. Click on the section to open it
2. Click **+ Add New Property**
3. Enter a property name
4. Select a property type
5. Configure any additional settings based on the type selected
6. Click **Create Property**
Your property is now available across all tickets in your workspace.
> **Note:** For tickets, you can mark certain properties as **mandatory** — ensuring your team always captures critical information before a ticket can be closed.
***
## Types of Custom Properties
Periskope offers six property types to cover different business needs:
| Type | What it's for |
| :--------------------- | :----------------------------------------------------------- |
| Text | Free-form information — notes, descriptions, account details |
| Date | Date picker — due dates, escalation dates, follow-up dates |
| File Upload | Attach files or documents directly to a ticket |
| Single-Select Dropdown | Pick one option from a predefined list |
| Multi-Select Dropdown | Pick multiple options from a predefined list |
| Dependent Dropdown | Hierarchical selection — up to three levels deep |
***
### Dependent Dropdown — Example
The dependent dropdown is the most advanced type. Each selection at one level determines the available options at the next — useful when you need to track layered information without free-form text errors.
**Example — Product Selection:**
* **Level 1 (Category):** Electronics, Appliances, Furniture
* **Level 2 (Product):** If "Electronics" is selected → Smartphones, Laptops, TVs
* **Level 3 (Model):** If "Smartphones" is selected → Model X, Model Y, Model Z
***
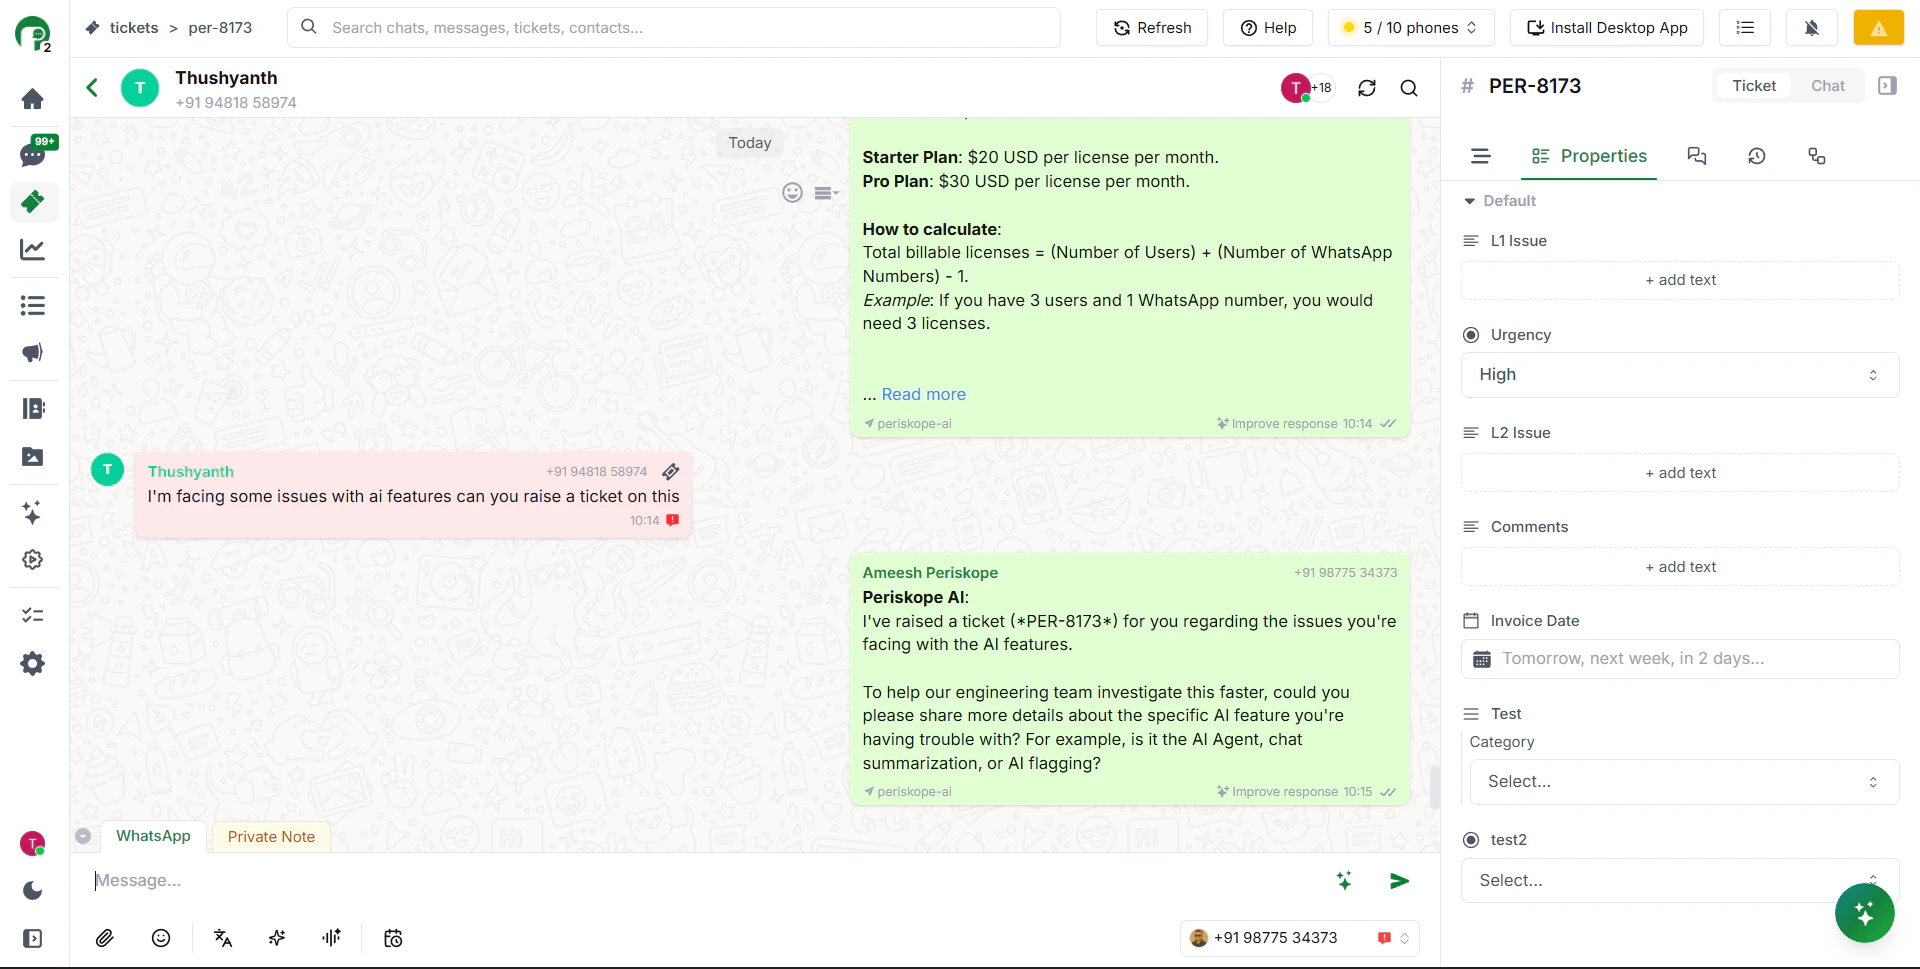
## Viewing Ticket Properties
Once properties are created, your team can view and fill them in from inside any ticket.
1. Open any ticket
2. You'll see all your custom sections and fields listed in the ticket detail view
3. Click any field to fill it in or update it
For example, you can:
* Mark the urgency as **High**, **Medium**, or **Low**
* Add a relevant **date**
* **Add comments** directly inside the ticket
***
## Managing Custom Properties
### Moving properties between sections
You can move a property from one section to another at any time to reorganise your structure.
### Reordering and deleting sections and properties
Sections and properties can be reordered or deleted as your needs change.
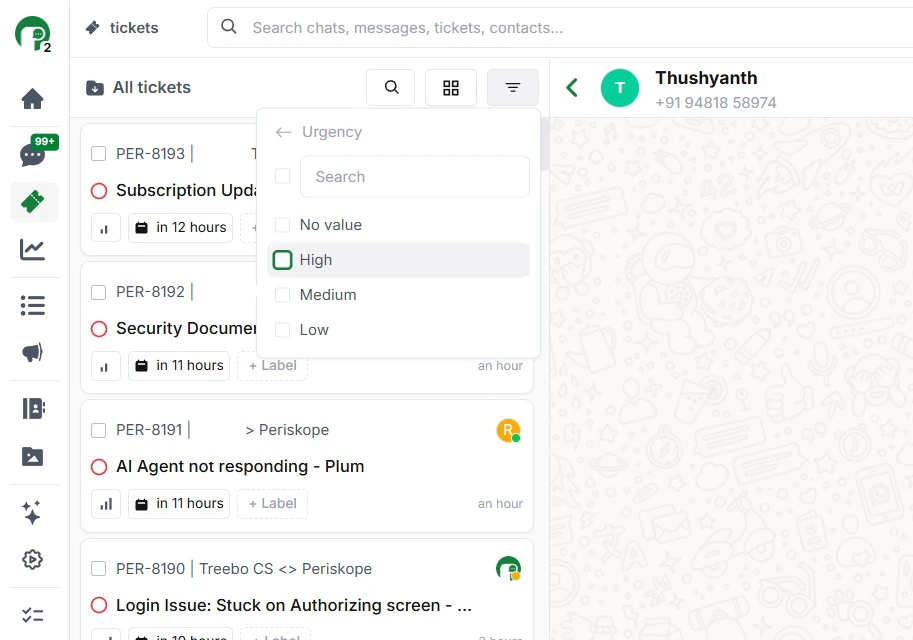
### Filtering tickets by custom properties
You can filter your ticket inbox based on custom property values — for example, showing only tickets where urgency is "High" or where a specific dropdown value is selected.
***
## Best Practices
**Keep it organised** — Group related properties into logical sections so your team can find what they need quickly.
**Use clear naming** — Make property names self-explanatory so there's no confusion about what to fill in.
**Start with essentials** — Begin with the most important properties and add more as needed, rather than creating everything at once.
**Use mandatory fields** — Mark critical properties as mandatory to ensure your team never closes a ticket without capturing the information you need.
**Review regularly** — Periodically check your properties to make sure they're still relevant and remove any that aren't being used.
**Train your team** — Make sure everyone knows how and when to fill in ticket properties, especially any that are marked mandatory.
***
 ***
### 2. Click on the Ticket tab
At the top of the page, click the **Ticket** tab to switch to ticket properties.
***
### 3. Create a new section
Properties are organised into sections. To create one:
1. Click **+ New Section** in the top right
2. Give the section a name — for example, "Issue Details" or "Resolution Info"
***
### 2. Click on the Ticket tab
At the top of the page, click the **Ticket** tab to switch to ticket properties.
***
### 3. Create a new section
Properties are organised into sections. To create one:
1. Click **+ New Section** in the top right
2. Give the section a name — for example, "Issue Details" or "Resolution Info"
 ***
### 4. Add a property to the section
1. Click on the section to open it
2. Click **+ Add New Property**
3. Enter a property name
4. Select a property type
5. Configure any additional settings based on the type selected
6. Click **Create Property**
***
### 4. Add a property to the section
1. Click on the section to open it
2. Click **+ Add New Property**
3. Enter a property name
4. Select a property type
5. Configure any additional settings based on the type selected
6. Click **Create Property**
 Your property is now available across all tickets in your workspace.
> **Note:** For tickets, you can mark certain properties as **mandatory** — ensuring your team always captures critical information before a ticket can be closed.
***
## Types of Custom Properties
Periskope offers six property types to cover different business needs:
| Type | What it's for |
| :--------------------- | :----------------------------------------------------------- |
| Text | Free-form information — notes, descriptions, account details |
| Date | Date picker — due dates, escalation dates, follow-up dates |
| File Upload | Attach files or documents directly to a ticket |
| Single-Select Dropdown | Pick one option from a predefined list |
| Multi-Select Dropdown | Pick multiple options from a predefined list |
| Dependent Dropdown | Hierarchical selection — up to three levels deep |
***
### Dependent Dropdown — Example
The dependent dropdown is the most advanced type. Each selection at one level determines the available options at the next — useful when you need to track layered information without free-form text errors.
**Example — Product Selection:**
* **Level 1 (Category):** Electronics, Appliances, Furniture
* **Level 2 (Product):** If "Electronics" is selected → Smartphones, Laptops, TVs
* **Level 3 (Model):** If "Smartphones" is selected → Model X, Model Y, Model Z
Your property is now available across all tickets in your workspace.
> **Note:** For tickets, you can mark certain properties as **mandatory** — ensuring your team always captures critical information before a ticket can be closed.
***
## Types of Custom Properties
Periskope offers six property types to cover different business needs:
| Type | What it's for |
| :--------------------- | :----------------------------------------------------------- |
| Text | Free-form information — notes, descriptions, account details |
| Date | Date picker — due dates, escalation dates, follow-up dates |
| File Upload | Attach files or documents directly to a ticket |
| Single-Select Dropdown | Pick one option from a predefined list |
| Multi-Select Dropdown | Pick multiple options from a predefined list |
| Dependent Dropdown | Hierarchical selection — up to three levels deep |
***
### Dependent Dropdown — Example
The dependent dropdown is the most advanced type. Each selection at one level determines the available options at the next — useful when you need to track layered information without free-form text errors.
**Example — Product Selection:**
* **Level 1 (Category):** Electronics, Appliances, Furniture
* **Level 2 (Product):** If "Electronics" is selected → Smartphones, Laptops, TVs
* **Level 3 (Model):** If "Smartphones" is selected → Model X, Model Y, Model Z
 ***
## Viewing Ticket Properties
Once properties are created, your team can view and fill them in from inside any ticket.
1. Open any ticket
2. You'll see all your custom sections and fields listed in the ticket detail view
3. Click any field to fill it in or update it
For example, you can:
* Mark the urgency as **High**, **Medium**, or **Low**
* Add a relevant **date**
* **Add comments** directly inside the ticket
***
## Viewing Ticket Properties
Once properties are created, your team can view and fill them in from inside any ticket.
1. Open any ticket
2. You'll see all your custom sections and fields listed in the ticket detail view
3. Click any field to fill it in or update it
For example, you can:
* Mark the urgency as **High**, **Medium**, or **Low**
* Add a relevant **date**
* **Add comments** directly inside the ticket
 ***
## Managing Custom Properties
### Moving properties between sections
You can move a property from one section to another at any time to reorganise your structure.
***
## Managing Custom Properties
### Moving properties between sections
You can move a property from one section to another at any time to reorganise your structure.
 ### Reordering and deleting sections and properties
Sections and properties can be reordered or deleted as your needs change.
### Filtering tickets by custom properties
You can filter your ticket inbox based on custom property values — for example, showing only tickets where urgency is "High" or where a specific dropdown value is selected.
### Reordering and deleting sections and properties
Sections and properties can be reordered or deleted as your needs change.
### Filtering tickets by custom properties
You can filter your ticket inbox based on custom property values — for example, showing only tickets where urgency is "High" or where a specific dropdown value is selected.
 ***
## Best Practices
**Keep it organised** — Group related properties into logical sections so your team can find what they need quickly.
**Use clear naming** — Make property names self-explanatory so there's no confusion about what to fill in.
**Start with essentials** — Begin with the most important properties and add more as needed, rather than creating everything at once.
**Use mandatory fields** — Mark critical properties as mandatory to ensure your team never closes a ticket without capturing the information you need.
**Review regularly** — Periodically check your properties to make sure they're still relevant and remove any that aren't being used.
**Train your team** — Make sure everyone knows how and when to fill in ticket properties, especially any that are marked mandatory.
***
***
## Best Practices
**Keep it organised** — Group related properties into logical sections so your team can find what they need quickly.
**Use clear naming** — Make property names self-explanatory so there's no confusion about what to fill in.
**Start with essentials** — Begin with the most important properties and add more as needed, rather than creating everything at once.
**Use mandatory fields** — Mark critical properties as mandatory to ensure your team never closes a ticket without capturing the information you need.
**Review regularly** — Periodically check your properties to make sure they're still relevant and remove any that aren't being used.
**Train your team** — Make sure everyone knows how and when to fill in ticket properties, especially any that are marked mandatory.
***