> ## Documentation Index
> Fetch the complete documentation index at: https://docs.periskope.app/llms.txt
> Use this file to discover all available pages before exploring further.
# Auto Assign Support Tickets
Your support team is growing, and with it comes a growing volume of tickets. Manually assigning each ticket takes time and leads to bottlenecks. Some team members get overloaded while others have capacity. What if tickets automatically distributed themselves to the right person? Using round-robin distribution ensures fair workload balance. Or assign specific ticket types to specific experts.
## How Automated Ticket Assignment Works
Periskope monitors every new ticket created in your system. When a ticket is created (manually or automatically), the system evaluates your assignment rules and instantly assigns the ticket to the right agent.
* Ticket is created in your system
* Automation rule triggers immediately
* System evaluates your conditions
* Ticket auto-assigns to next available agent
* Agent is notified and starts working
## Step-by-Step Setup
> ### Step 1: Access Automation Rules
1. From the Periskope dashboard, go to Automation Rules
2. Click New Rule
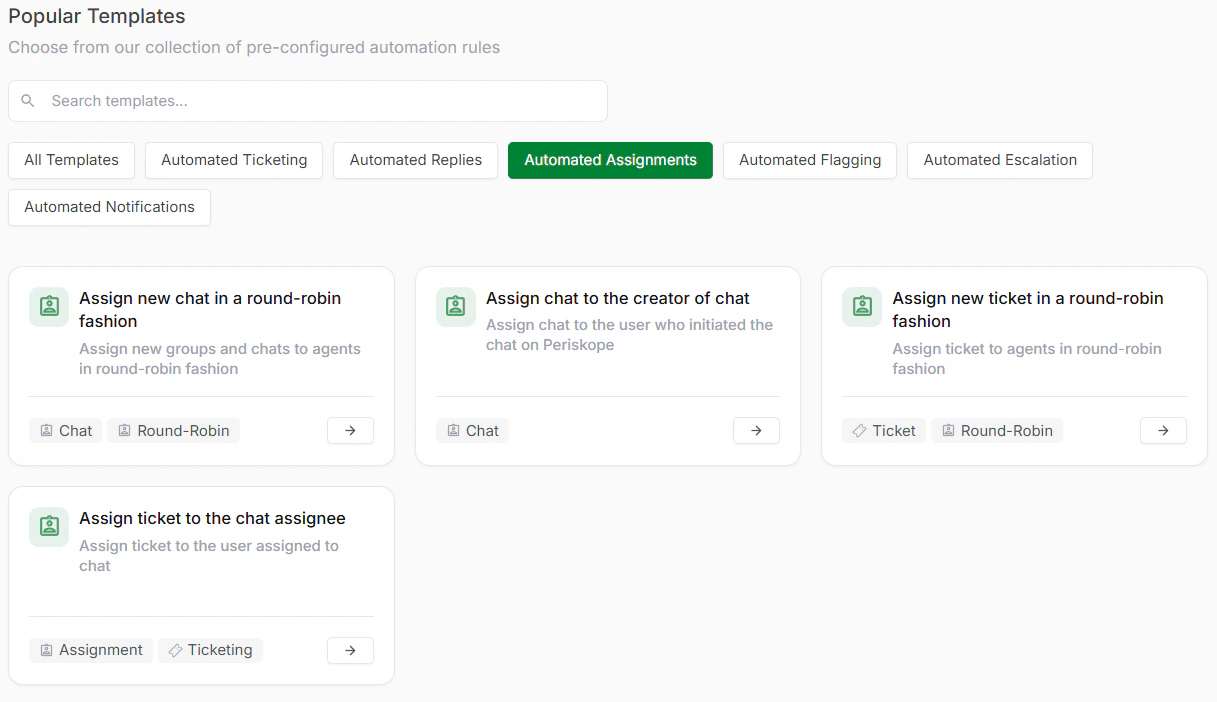
3. Select Start From Template
You'll see several automation templates. Look for "Automated Assignments" and select it. Then choose "Assign new ticket in a round robin fashion"
> ### Step 2: Review the Trigger
The trigger is automatically pre-configured to monitor all new tickets. This means whenever a new ticket is created, whether manually or automatically through another automation rule, this rule will activate.
What This Means: Every ticket created in your system will go through this assignment rule. The trigger is always active, watching for new tickets that need to be assigned.
> ### Step 3: Set Up Your Conditions
Conditions let you control which tickets get assigned by this rule. You can create simple or complex conditions depending on your needs.
Example Conditions: Chat label matches 'Support'; Message body contains 'billing'; Chat priority is 'High'; Message is from saved contact; Time is within business hours; etc.
> ### Step 4: Choose Your Assignment Method
You have two main options for how tickets are assigned:
| Method | How It Works | Best For |
| ---------------- | ------------------------------------------------------------------------ | ---------------------------------------------------------------- |
| Round Robin | Tickets cycle through your team list, ensuring equal distribution. | Fair workload balance across team. |
| Fixed Assignment | All matching tickets go to a specific person or team. | Specialized support to customers (billing, technical, etc.) |
Important: Agent Availability Periskope respects each agent's business hours and availability settings. Tickets are only assigned to agents who are currently available. If no one is available, the system will retry until an agent comes online.
> ### Step 5: Select Your Assignment Team
Choose which agents should be included in the assignment pool. You can select:
* Individual team members
* Entire teams or departments
* Agents by skill level or specialty
* Custom agent groups
> ### Step 6: Save and Publish
1. Review all your settings
2. Click Save Rule and Publish it to get it online
3. Your automation is now active and monitoring
From this point forward, whenever a ticket is created and the message or chat matches your defined conditions, the ticket will be assigned to your team member(s).
 > ### Step 2: Review the Trigger
The trigger is automatically pre-configured to monitor all new tickets. This means whenever a new ticket is created, whether manually or automatically through another automation rule, this rule will activate.
> ### Step 2: Review the Trigger
The trigger is automatically pre-configured to monitor all new tickets. This means whenever a new ticket is created, whether manually or automatically through another automation rule, this rule will activate.
 > ### Step 4: Choose Your Assignment Method
You have two main options for how tickets are assigned:
| Method | How It Works | Best For |
| ---------------- | ------------------------------------------------------------------------ | ---------------------------------------------------------------- |
| Round Robin | Tickets cycle through your team list,
> ### Step 4: Choose Your Assignment Method
You have two main options for how tickets are assigned:
| Method | How It Works | Best For |
| ---------------- | ------------------------------------------------------------------------ | ---------------------------------------------------------------- |
| Round Robin | Tickets cycle through your team list,  > ### Step 6: Save and Publish
1. Review all your settings
2. Click Save Rule and Publish it to get it online
3. Your automation is now active and monitoring
From this point forward, whenever a ticket is created and the message or chat matches your defined conditions, the ticket will be assigned to your team member(s).
> ### Step 6: Save and Publish
1. Review all your settings
2. Click Save Rule and Publish it to get it online
3. Your automation is now active and monitoring
From this point forward, whenever a ticket is created and the message or chat matches your defined conditions, the ticket will be assigned to your team member(s).