> ## Documentation Index
> Fetch the complete documentation index at: https://docs.periskope.app/llms.txt
> Use this file to discover all available pages before exploring further.
# Introduction
> Listen to events on Periskope and build your custom integrations
While building your own WhatsApp integrations with Periskope, you might want to listen to events in real time. You can do this with Periskope's Webhooks.
Simply register a Webhook endpoint with Periskope and start receiving different events occuring inside the Periskope platform.
You can also receive events with our [Typescript SDK](/api-reference/sdk)
## Prerequisites
1. A `Periskope account`: To use the Periskope API, you need to have a Periskope account. If you don't have one, you can sign up for a free trial [here](https://console.periskope.app).
2. An `HTTP POST /` Endpoint: Prepare your server to start receiving POST requests. Your server should have an endpoint ready to catch data sent by Periskope when events are sent.
In order to start receiving webhooks, you need to have a server that can handle incoming HTTP POST requests. The POST request endpoint needs to be open and publicly accessible without any authentication.
## Setting up webhooks on Periskope 🔧
You can access the webhook configuration through your Periskope settings or click [here](https://console.periskope.app/settings/integrations/webhooks) to visit. Here, you can manage and set up new webhooks.
Click on the `Add Webhook` button. This opens a modal where you can enter
the URL that will receive the webhook POST requests.
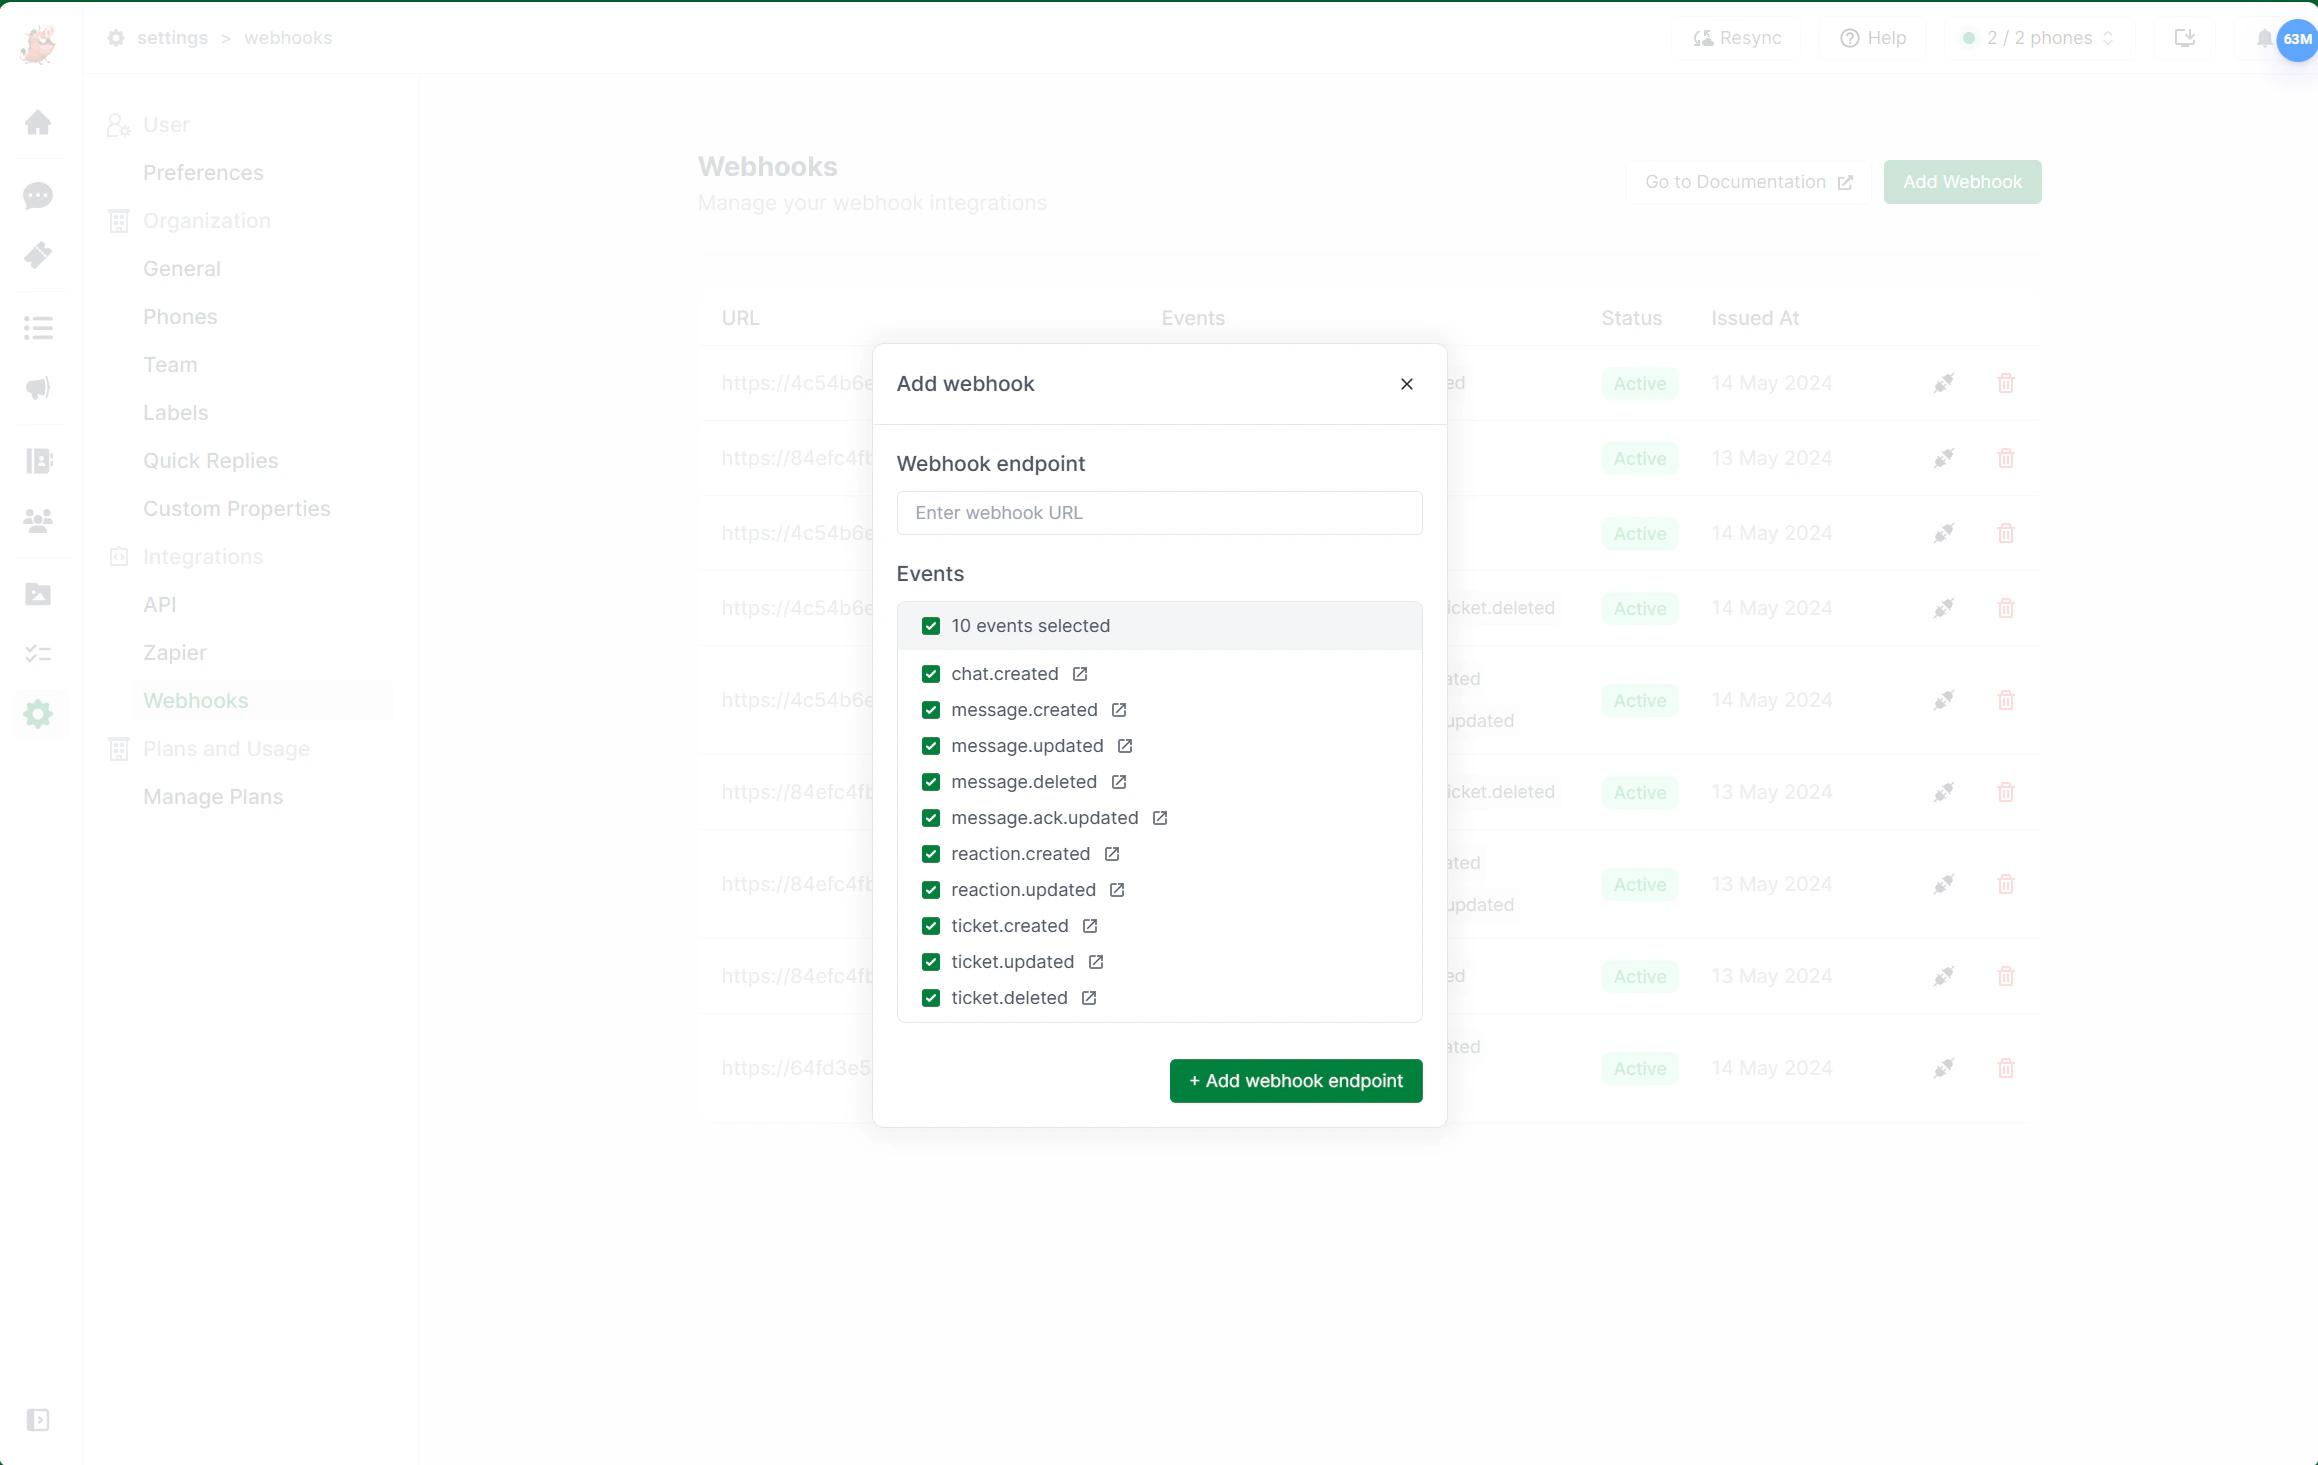 Choose the events you want to subscribe to from the list below. Each event
corresponds to different actions or changes in Periskope and whatsapp that
you can receive notifications for.
Choose the events you want to subscribe to from the list below. Each event
corresponds to different actions or changes in Periskope and whatsapp that
you can receive notifications for.
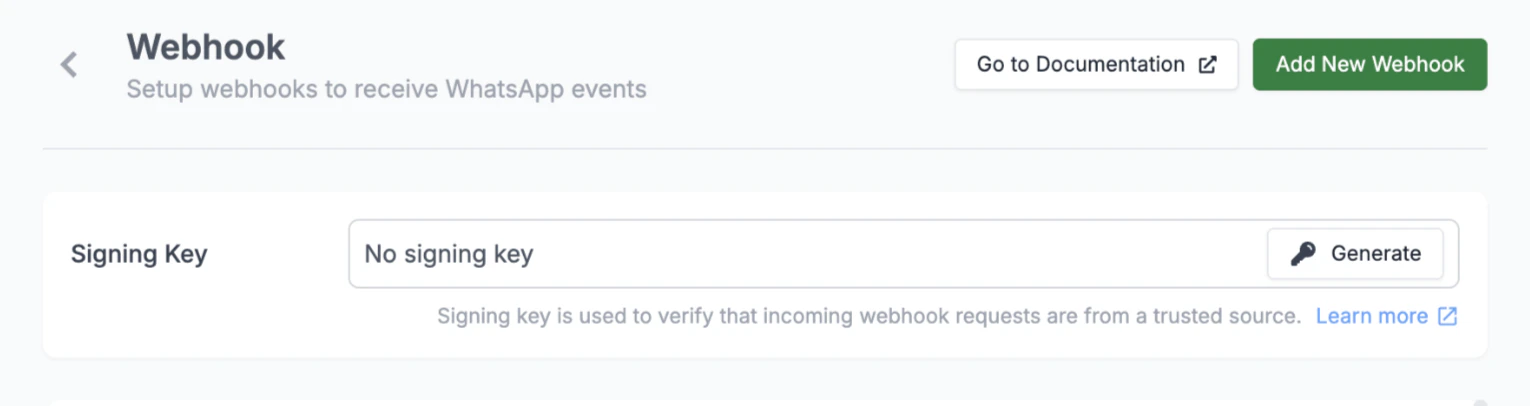 Signing Keys are used to verify that the webhook events that you receive on your destination come from a trusted source.
You can generate a Signing Key on the Webhook Screen by clicking on the `Generate` button. After copying your Signing Key, do not
share it to keep it protected. Learn more about how to verify your Signing Key on your server here.
After configuring the URL and selecting the desired events, save your
settings to activate the webhook.
## Result 🚀
Webhooks are now setted up on your Periskope account. Your endpoint will now receive HTTP POST requests whenever the subscribed events occur on the Periskope platform.
You can test your webhook by triggering any selected event from the Periskope platform.
### Event structure 📦
You'll be receiving the data in the following format:
```json theme={null}
{
"event": "",
"data": "", // complete data object as mentioned in Objects section
"org_id": "",
"timestamp": "" // timestamp of the event creation
}
```
## Verifying your Signing Key
A signing key is used to verify that the events received in your webhook endpoints are from a trusted source. Periskope generates an
encrypted HMAC key for every request and sends the key in the `x-periskope-signature` header. On your webhook endpoint, you can check
this signature by decrypting the secret key and verifying the legitimacy of a request.
You can generate your Singing Key from `Settings > Webhooks` screen.
Signing Keys are used to verify that the webhook events that you receive on your destination come from a trusted source.
You can generate a Signing Key on the Webhook Screen by clicking on the `Generate` button. After copying your Signing Key, do not
share it to keep it protected. Learn more about how to verify your Signing Key on your server here.
After configuring the URL and selecting the desired events, save your
settings to activate the webhook.
## Result 🚀
Webhooks are now setted up on your Periskope account. Your endpoint will now receive HTTP POST requests whenever the subscribed events occur on the Periskope platform.
You can test your webhook by triggering any selected event from the Periskope platform.
### Event structure 📦
You'll be receiving the data in the following format:
```json theme={null}
{
"event": "",
"data": "", // complete data object as mentioned in Objects section
"org_id": "",
"timestamp": "" // timestamp of the event creation
}
```
## Verifying your Signing Key
A signing key is used to verify that the events received in your webhook endpoints are from a trusted source. Periskope generates an
encrypted HMAC key for every request and sends the key in the `x-periskope-signature` header. On your webhook endpoint, you can check
this signature by decrypting the secret key and verifying the legitimacy of a request.
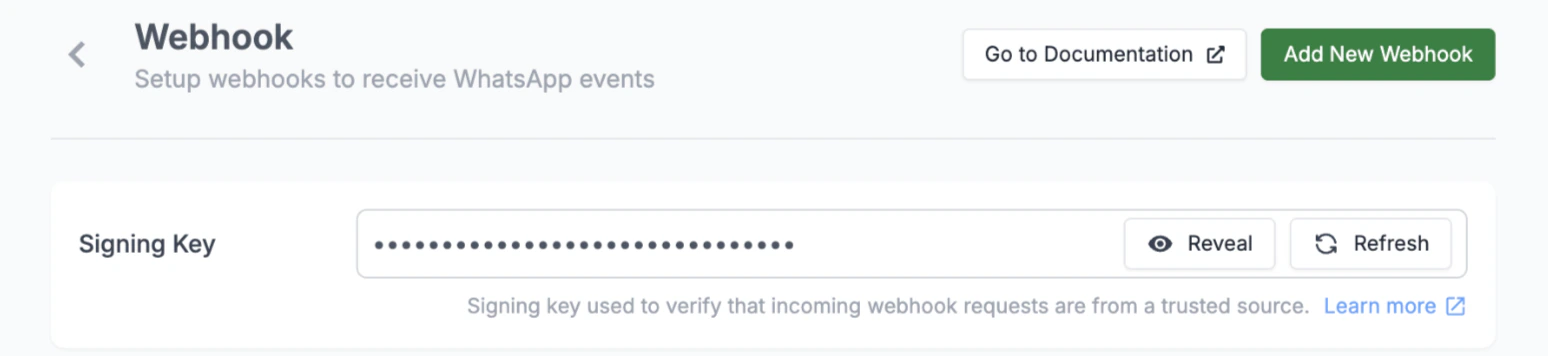
You can generate your Singing Key from `Settings > Webhooks` screen.
 Follow the code snippet below to verify your signing key on your server:
```typescript theme={null}
import * as express from "express";
import { createHmac } from "crypto";
// Replace this with your actual signing key obtained from the Periskope dashboard (to be stored in .env)
const SHARED_SECRET = "YOUR_SIGNING_SECRET";
const app = express();
app.use(express.json());
// Verification function to check the signature of the request
function verifySignature(rawBody: Record, signature: string) {
// Create an HMAC SHA256 hash using the shared secret key
const hmac = createHmac("sha256", SHARED_SECRET);
// Update the HMAC hash with the stringified payload
hmac.update(JSON.stringify(rawBody));
// Calculate the HMAC digest in hexadecimal format
const digest = hmac.digest("hex");
// Compare the calculated digest with the signature provided in the header
return digest === signature;
}
// Webhook endpoint handler for POST requests to /webhook
app.post("/webhook", (req: express.Request, res: express.Response) => {
// Extract the signature from the 'x-periskope-signature' header
const signature = req.headers["x-periskope-signature"] as string;
// Verify the signature of the incoming request.
// It's important to use the raw request body before any parsing/modification
// if your framework modifies the body.
// Here, we assume `req.body` contains the parsed JSON object.
const isValid = verifySignature(req.body, signature);
// If the signature is invalid, respond with an Unauthorized status
if (!isValid) {
return res.status(401).send("Invalid signature");
}
// If the signature is valid, process the webhook event
console.log("Received valid webhook event:", req.body);
// Add your custom logic here to handle the event (e.g., update database, send notifications)
res.status(200).send("ok");
});
const PORT = 3000;
app.listen(PORT, () => {
console.log(`Webhook server listening on port ${PORT}`);
});
```
Follow the code snippet below to verify your signing key on your server:
```typescript theme={null}
import * as express from "express";
import { createHmac } from "crypto";
// Replace this with your actual signing key obtained from the Periskope dashboard (to be stored in .env)
const SHARED_SECRET = "YOUR_SIGNING_SECRET";
const app = express();
app.use(express.json());
// Verification function to check the signature of the request
function verifySignature(rawBody: Record, signature: string) {
// Create an HMAC SHA256 hash using the shared secret key
const hmac = createHmac("sha256", SHARED_SECRET);
// Update the HMAC hash with the stringified payload
hmac.update(JSON.stringify(rawBody));
// Calculate the HMAC digest in hexadecimal format
const digest = hmac.digest("hex");
// Compare the calculated digest with the signature provided in the header
return digest === signature;
}
// Webhook endpoint handler for POST requests to /webhook
app.post("/webhook", (req: express.Request, res: express.Response) => {
// Extract the signature from the 'x-periskope-signature' header
const signature = req.headers["x-periskope-signature"] as string;
// Verify the signature of the incoming request.
// It's important to use the raw request body before any parsing/modification
// if your framework modifies the body.
// Here, we assume `req.body` contains the parsed JSON object.
const isValid = verifySignature(req.body, signature);
// If the signature is invalid, respond with an Unauthorized status
if (!isValid) {
return res.status(401).send("Invalid signature");
}
// If the signature is valid, process the webhook event
console.log("Received valid webhook event:", req.body);
// Add your custom logic here to handle the event (e.g., update database, send notifications)
res.status(200).send("ok");
});
const PORT = 3000;
app.listen(PORT, () => {
console.log(`Webhook server listening on port ${PORT}`);
});
```